If you think birthday parties are just for humans, think again—your four-legged best friend deserves a tail-wagging celebration too! From dog-friendly cakes to fun-themed paw-ties, throwing a unique birthday bash for your pup isn’t just adorable—it’s also a great way to show your appreciation for their unconditional love. And you’re not alone: over 70% of U.S. pet owners celebrate their pet’s birthday or “gotcha day” in some special way, according to a study by OnePoll via Rover. Whether your dog is a diva or a laid-back cuddle bug, we’ve got some seriously fun, creative, and paw-sitively unforgettable ideas to make their special day truly howl-worthy.
Planning a Dog Birthday Party
Essential Preparations
Select a date and time that suits your schedule and guests.
Create a checklist to ensure everything is ready: food, decorations, and activities.
Choosing the Perfect Venue
Options include:
Your backyard for a relaxed vibe.
A local park for an outdoor adventure.
Pet-friendly venues for a stress-free celebration.
Throwing a party for your pet strengthens your bond, provides socialization opportunities, and creates unforgettable memories.
Conclusion
Celebrating your pet’s birthday is not only about fun but also about showing your furry companion how cherished they are. With the right planning, theme, and activities, your dog’s birthday party will be a hit among both canine and human guests!
Hot spots on dogs can appear seemingly out of nowhere and spread with surprising speed. Imagine this: one moment your furry friend is happy and healthy, and the next, they’re obsessively licking and chewing at a spot on their skin that’s red, raw, and painful. These “hot spots,” also known as acute moist dermatitis, are more than just a surface irritation; they can quickly become painful, infected lesions that require immediate attention. Understanding what causes hot spots on dogs and knowing how to effectively treat and prevent them is key to keeping your canine companion comfortable and healthy.
Hot spots are inflamed and infected patches of skin that can develop rapidly. Known medically as acute moist dermatitis, these lesions typically appear as round, red inflamed spots that ooze and cause the surrounding hair to mat down. Various factors can lead to this condition, including allergies, infections, and underlying skin issues.
The term “moist dermatitis” encapsulates the essence of the condition; it is characterized by the presence of moisture, often due to excessive licking or biting from the dog.
Hot spots can sometimes be referred to by different names, including:
Alternate Name
Description
Summer Sores
Often seen in warmer months
Acute Moist Dermatitis
Medical term used by veterinarians
Symptoms & Identification
Identifying hot spots early is crucial for effective treatment. The appearance of a hot spot is often alarming:
Visual Appearance: Hot spots usually present as red, inflamed areas that ooze pus. They may appear crusty or scabbed and are typically warm to the touch.
Common Locations: They can show up anywhere on the dog’s body but are often found in the following areas:
Common Locations
Description
Head
Frequently around the ears and eyes
Hips
Often occurs where the skin is thicker
Limbs
Commonly found between the paws and legs
Rump
Can be prevalent in long-haired breeds
Behavioral Signs
Your dog may exhibit more than just physical symptoms. Common behaviors associated with hot spots include:
-Excessive itching, licking, or scratching
-Restlessness, as they may be uncomfortable
-Signs of pain or irritation when the area is touched
-Pus or fluid discharge from the area
Recognizing these symptoms early can aid in effective treatment and improve your dog’s comfort.
Underlying Causes & Risk Factors
Hot spots don’t just appear out of thin air. Understanding the potential triggers and risk factors involved can help you manage and prevent these skin infections effectively.
Self-trauma Loop
One critical aspect of hot spots is the self-trauma loop. Here’s how it generally works:
Initial Irritation: Something irritates your dog’s skin (like insect bites, allergies, or moisture).
Licking and Chewing: To relieve itchiness or discomfort, your dog licks or bites the area.
Infection Development: This constant trauma breaks the skin’s barrier, allowing bacteria to enter, which leads to infection.
Increased Discomfort: As the infection develops, your dog may lick even more, thereby continuing the cycle.
Common Triggers
Multiple factors can contribute to the onset of hot spots, including:
Trigger
Description
Allergies (Flea, Food, Atopic)
Allergies can lead to itching, which means more licking and biting
Ear/Skin Infections
Existing infections can create hot spots
Matting and Moisture
Matting trap moisture close to the skin, creating an ideal environment for bacteria
Stress and Anxiety
Stress can lead to excessive licking
High-Risk Breeds
Certain breeds are more prone to developing hot spots due to their skin type and coat. Common high-risk breeds include:
-German Shepherds
-Retrievers (Golden, Labrador)
-Rottweilers
-Saint Bernards
If your dog belongs to one of these breeds, being vigilant about skin health is essential.
Diagnosis: The Importance of Veterinary Care
If you suspect your dog has a hot spot, a trip to the veterinarian is critical. The vet will conduct a thorough examination, which may include:
Physical Exam: They will assess the hot spot and surrounding tissues.
Diagnostic Tests: Additional tests could include skin scrapings, cultures, or allergy panels to identify underlying issues.
Determines the type of bacteria or yeast causing the infection
Allergy Panels
Assesses for allergies that may contribute to skin issues
It’s essential to get a professional diagnosis to choose the best treatment route.
Treatment Protocol: Home Care and Veterinary Options
Once diagnosed, the treatment process can begin. Below are two approaches: home care and professional veterinary care.
Home Care Steps
Depending on the severity, here are some initial home care steps you can take:
Trim or Shave the Area: Carefully trim the fur around the hot spot to allow it to breathe and dry out. Be cautious, as the skin may be sensitive.
Clean the Lesion: Use warm water and mild antibacterial soap recommended by your vet to gently clean the area. Make sure to thoroughly dry it afterward.
Prevent Licking: An Elizabethan collar (the cone of shame) can help stop your dog from licking and biting at the area.
Monitor Progress: Keep an eye on the hot spot; if it doesn’t improve within 48 hours, seek veterinary care.
Veterinary Care Options
If the hot spot is severe or doesn’t respond to home care, veterinary intervention may be necessary. Treatments can include:
Clipping and Cleaning: The vet may need to clip the area more thoroughly under sedation if required.
Antiseptic Cleaning: After cleaning, the veterinary team may apply topical antiseptics.
Oral and Topical Medications: Antibiotics, steroids for inflammation, and pain relief medications may also be prescribed based on the diagnosis.
Healing Timeline & Prognosis
With effective treatment, a hot spot should show signs of improvement within 3-7 days. Here’s a general timeline:
Time Period
Expected Outcome
1-3 Days
Initial cleaning and treatment; some reduction in redness appears
4-7 Days
Noticeable healing with reduction in size and irritation
2 Weeks
Full recovery expected with continuous care
It’s crucial to remember that addressing the underlying causes is vital for full recovery and preventing recurrence.
Prevention Strategies: Keeping Hot Spots at Bay
A proactive approach can save your dog from discomfort and you from unnecessary worry. Here are some effective strategies to minimize the risk of hot spots:
Routine Grooming
Regular grooming is essential, particularly for breeds with thick or long fur. It can help avoid matting and keep the coat clean and healthy. Here’s how often each breed may need grooming:
Breed Type
Recommended Grooming Frequency
Short-haired (e.g., Beagle)
At least once a month
Medium-haired (e.g., Cocker Spaniel)
Every 2-4 weeks
Long-haired (e.g., Afghan Hound)
Weekly to daily
Prompt Parasitic Control
Flea and tick preventatives are essential to deter any itchy bites that can trigger hot spots. Consider these options:
Topical Treatments: Monthly treatments that you apply to the skin.
Oral Medications: These can offer longer-lasting protection against fleas and ticks.
Collars: Some collars are specifically designed to repel pests.
Drying Thoroughly Post-Play
If your dog enjoys swimming or bathing, always dry them thoroughly afterward, particularly in moisture-sensitive areas such as their ears and armpits.
Nutritional Support
Incorporate specific fatty acids into your dog’s diet for better skin health.
Getting a Diagnosis: Why a Vet Visit is Crucial
We touched on this earlier, but let’s really underline why a professional diagnosis is non-negotiable when you suspect your dog has a hot spot. While you might recognize the classic signs – the redness, oozing, and frantic licking – figuring out the why behind the hot spot is the detective work your vet specializes in. It’s not just about treating the symptom; it’s about finding and fixing the root cause to prevent future flare-ups.
When you bring your dog in, your vet will perform a thorough physical exam. They’ll take a close look at the hot spot itself, noting its size, depth, location, and how it looks. But they won’t stop there. They’ll also do a full check-up on your dog’s overall health. They’ll ask you a ton of questions about your dog’s lifestyle – their diet, whether they’ve been swimming recently, if they’ve been scratching or licking other areas, any known allergies, their flea prevention routine, and if anything stressful has happened lately. This is your chance to provide them with all the puzzle pieces!
To really get to the bottom of things, your vet might recommend some tests. These aren’t just random tests, they’re specific tools to help identify the culprit.
Cytology: This is a super common test for hot spots. Your vet will gently take a swab or make an impression smear of the hot spot’s surface. They’ll then look at it under a microscope to see what kinds of cells, bacteria, and yeast are present. This helps them figure out the type of infection and choose the right medication.
Skin Culture and Sensitivity Testing: Sometimes, especially if the infection seems stubborn or severe, your vet might send a sample to a lab for a culture. This test grows the bacteria or yeast in the sample, and then they test which antibiotics or antifungals are most effective at killing it. It’s like getting a personalized battle plan against the infection!
Skin Scrapings: If your vet suspects parasites like mites are involved, they’ll perform a skin scraping. They use a small blade (don’t worry, it’s usually painless or causes minimal discomfort) to collect a tiny sample from the skin’s surface or just under it, then examine it under a microscope for those tiny critters.
Allergy Testing: Since allergies are such a major cause of recurrent hot spots, your vet might suggest allergy testing. This could be blood tests or intradermal skin testing (where tiny amounts of potential allergens are injected under the skin to see if there’s a reaction). Identifying specific allergens helps in developing a long-term management plan.
Getting these tests done might seem like extra steps, but they are incredibly valuable in making sure your dog gets the right treatment and in preventing those frustrating hot spots from coming back again and again.
Once the diagnosis is made and the underlying cause is being investigated, treating the hot spot itself becomes the immediate priority. The goal is to clean the area, stop the infection, reduce inflammation and pain, and prevent your dog from making it worse. Treatment often involves a combination of home care steps you’ll perform and medications prescribed by your vet.
Here’s a breakdown of typical treatment approaches:
Treatment Type
Description
Purpose
Clipping/Shaving
Carefully trimming or shaving hair from and around the hot spot.
Allows air circulation, drying of the lesion, and access for cleaning and medication application. Prevents matting over the sore.
Cleaning
Gently cleaning the hot spot with warm water and an antiseptic solution (e.g., chlorhexidine or povidone-iodine, diluted).
Removes pus, crusts, bacteria, and debris. Helps disinfect the wound. Always use vet-approved solutions.
Drying
Thoroughly drying the area after cleaning using a clean towel or even a cool setting on a hairdryer.
Moisture encourages bacterial growth; keeping the area dry is crucial for healing.
Topical Medications
Creams, ointments, sprays, or wipes applied directly to the hot spot. May contain antibiotics, steroids, or drying agents.
Fight bacterial infection, reduce inflammation, relieve itching, and help dry out the lesion.
Oral Medications
Antibiotic pills/liquids, steroid pills/liquids, or pain relievers given by mouth.
Treat systemic bacterial infections, reduce widespread inflammation and itching, and manage pain associated with the hot spot.
Elizabethan Collar (E-Collar)
A cone-shaped collar worn around the neck.
Physically prevents the dog from licking, chewing, or scratching the hot spot, which is essential for healing and stopping self-trauma.
Your vet will tailor the treatment plan specifically to your dog’s needs, considering the size and severity of the hot spot, the identified underlying cause, and your dog’s overall health. They might show you exactly how to clean and apply medications at home. Stick to their instructions diligently – consistency is key!
Let’s chat a bit more about the medications.
Antibiotics: Since hot spots are almost always infected with bacteria, antibiotics are a cornerstone of treatment. They might prescribe a topical antibiotic cream or spray for smaller, superficial hot spots, or oral antibiotics for larger, deeper, or more severe infections. It’s super important to finish the entire course of antibiotics, even if the hot spot looks better, to make sure the infection is completely cleared.
Steroids: To combat the intense inflammation and itching that makes dogs lick and chew, vets often prescribe steroids. These can be topical (in creams or sprays) or oral. Steroids work wonders in breaking the itch-scratch cycle, but they need to be used carefully and exactly as prescribed due to potential side effects.
Pain Relief: Hot spots can be quite painful! Your vet might prescribe pain medication to keep your dog comfortable during the healing process. Never give your dog over-the-counter human pain relievers like ibuprofen or acetaminophen, as these can be toxic to dogs.
Sometimes, if the hot spot is very large, deep, or if your dog is particularly anxious or aggressive due to the pain, the vet might need to sedate them to properly clip and clean the area in the clinic. This ensures the job is done safely and thoroughly.
Remember, while some mild hot spots might show slight improvement with just clipping and cleaning at home, they very rarely heal completely without veterinary intervention because that pesky self-trauma just keeps the cycle going. Don’t hesitate to call your vet!
The Road to Recovery: Healing Timeline and Prognosis
Once treatment begins, you should typically start seeing positive changes within just a few days – usually within 3 to 7 days. The redness should lessen, the oozing should stop, and the area should start to dry out and form a scab. The intense itching should also decrease, especially with the help of medication. While the initial improvement is quick, complete healing of the skin and hair regrowth will take longer, often around two weeks or sometimes a bit more for large lesions.
During the healing process, keep the area clean and dry, continue using the E-collar (seriously, no cheating!), and follow your vet’s instructions to a T. You’ll likely need to check the hot spot regularly to monitor its progress and make sure it’s healing as expected.
The prognosis, or outlook, for a hot spot itself is excellent. With appropriate and timely treatment, hot spots almost always heal completely. However, the long-term prognosis for preventing future hot spots depends entirely on identifying and managing the underlying cause. If the reason what causes hot spots on dogs in your specific case – be it allergies, fleas, or something else – isn’t addressed, the chances of dealing with another hot spot down the road are unfortunately pretty high. This underscores the importance of working with your vet not just to fix the current problem, but to prevent the next one.
Keeping Hot Spots at Bay: Prevention Strategies
An ounce of prevention is worth a pound of cure, right? This old saying is definitely true when it comes to hot spots. By being proactive and incorporating some key strategies into your dog’s routine, you can significantly reduce the likelihood of these irritating lesions popping up.
Here are some powerful prevention strategies:
Prevention Strategy
Description
Why it Helps Prevent Hot Spots
Routine Grooming
Regular brushing (especially for long-haired breeds), bathing with appropriate shampoos, and keeping the coat clean and tangle-free.
Prevents matting which traps moisture and irritants; removes allergens and debris from the coat; keeps skin healthy.
Effective Parasite Control
Using year-round, veterinary-recommended products to prevent and kill fleas, ticks, mites, and other external parasites.
Flea bite allergies are a major hot spot trigger; eliminating parasites removes a primary source of irritation and prevents infestation.
Thorough Drying
Completely drying your dog’s coat, especially after swimming, baths, or walks in the rain. Pay attention to hidden areas.
Excess moisture on the skin is a perfect breeding ground for the bacteria that cause hot spots. Keeping skin dry is key.
Allergy Management
Working with a vet to identify and manage allergies (flea, food, environmental) through diet, medication, or immunotherapy.
Allergies cause intense itching and inflammation, leading to scratching and licking that initiates the hot spot cycle. Managing allergies reduces the trigger.
Skin Health Supplements
Adding supplements rich in Omega-3 and Omega-6 fatty acids (like fish oil), zinc, and selenium to your dog’s diet.
Supports a healthy skin barrier, reduces inflammation, and promotes overall skin wellness, making it more resistant to infection.
Stress Reduction & Enrichment
Ensuring your dog gets enough physical exercise and mental stimulation; addressing separation anxiety or other behavioral issues.
Boredom, anxiety, and stress can lead to obsessive licking and chewing behaviors, which can trigger hot spots. Keeping your dog happy and busy helps.
Let’s look at some of these in a bit more detail.
Grooming isn’t just about looking pretty! Regular brushing helps distribute natural skin oils, keeps the coat healthy, and allows you to spot any skin issues early. For breeds with thick undercoats or long hair, preventing mats is super important. Mats pull on the skin, create moist pockets, and can hide underlying problems until they become severe hot spots. Bathing frequency depends on your dog’s breed and lifestyle, but using a gentle, dog-specific shampoo recommended by your vet can help keep the skin clean and healthy.
When it comes to parasites, don’t mess around! A single flea bite can send an allergic dog into an itching frenzy, quickly leading to a hot spot. Consistent use of effective flea, tick, and heartworm prevention year-round is one of the best investments you can make in your dog’s health and comfort. Talk to your vet about which products are best for your dog’s needs and your local parasite risks.
We can’t emphasize drying enough! It seems simple, but residual moisture trapped against the skin is a prime culprit in hot spot development. Think about how uncomfortable it is to wear wet clothes – dogs feel it too! Towel drying is good, but for thick-coated dogs, using a cool setting on a pet-specific dryer or even a regular hairdryer can make a big difference. Pay special attention to areas that don’t get much airflow.
Managing allergies is often the trickiest part of preventing recurrent hot spots. If your vet suspects allergies, be prepared to work with them on a long-term plan. This might involve elimination diets to rule out food allergies, using air filters or wiping down your dog after being outside to reduce environmental allergen exposure, or using medications to control the allergic reaction. It can be a process of trial and error, but finding ways to keep your dog’s allergies in check is vital for preventing hot spots caused by constant itching.
Adding supplements for skin health can provide an extra layer of defense. Omega fatty acids help maintain a strong skin barrier, making it harder for bacteria and yeast to cause problems. They also have anti-inflammatory properties. Always consult your vet before adding any supplements to your dog’s diet to ensure they are appropriate and the correct dosage.
Finally, consider your dog’s mental and emotional well-being. A bored or anxious dog might turn to obsessive licking or chewing as a way to cope. Ensuring they get plenty of exercise, interactive playtime, puzzle toys, or even training sessions can help redirect that energy and reduce stress. If your dog has significant anxiety, behavioral training or even medication might be necessary, again, in consultation with your vet.
Let’s look at the different potential triggers for hot spots in dogs:
Can lead to excessive, obsessive licking or chewing as a coping mechanism, causing skin damage.
Other Medical
Underlying pain (arthritis, injury), anal sac issues, etc.
Dog might lick the area near the source of pain, leading to a hot spot.
Understanding these potential causes is really helpful for working with your vet to figure out what causes hot spots on dogs in your dog’s specific situation. It’s often a combination of factors rather than just one thing.
Alright, we’ve gone on quite the journey exploring the world of hot spots in dogs. We’ve learned that these aren’t just minor skin irritations but rather acute, often painful, infected lesions driven by that frustrating cycle of itch, trauma, and infection. Understanding what causes hot spots on dogs – from allergies and parasites to moisture and stress – is the first big step in preventing them.
We’ve seen that while prompt home care involving careful clipping, cleaning, and preventing licking is important, veterinary diagnosis and treatment are usually essential for proper healing and to identify the underlying trigger. Quick action really does lead to faster healing and helps avoid complications like deeper infections.
Ultimately, keeping your dog free from hot spots is about embracing a holistic approach to their care. This means committing to regular grooming, staying on top of parasite prevention, ensuring they are thoroughly dried after getting wet, providing a balanced diet that supports skin health, managing any allergies effectively, and making sure your dog is happy and mentally stimulated.
It’s a team effort between you and your vet! By staying vigilant, knowing the signs, and implementing these prevention strategies, you can significantly reduce the chances of your furry friend ever having to deal with the discomfort of hot spots. Let’s keep those tails wagging and those paws itch-free! Remember, if you see signs of a hot spot, don’t delay – reach out to your vet.
FAQs
1. How can I soothe my dog’s itching from a hot spot at home before I see the vet?
While waiting for your vet appointment, you can try gently cleaning the area (after clipping the hair if possible and safe) with cool water or a diluted antiseptic solution recommended by a vet and keeping it dry. An E-collar is essential to prevent licking. Do not apply human medications unless directed by your vet.
2. Will a hot spot leave a scar?
In most cases, with proper treatment, hot spots heal without permanent scarring. The hair will typically grow back completely. However, severe, deep, or recurrent hot spots that cause significant tissue damage can potentially leave some minor scarring or changes in skin texture or pigmentation.
3. How long will my dog need to wear the Elizabethan collar?
Your dog will need to wear the E-collar continuously until the hot spot is completely dried out and no longer bothering them, and often until the hair starts to regrow. This can range from a few days to a couple of weeks. It’s frustrating, but absolutely necessary!
4. Can hot spots spread to other parts of the dog’s body?
While a single hot spot typically doesn’t “spread” to become new, separate hot spots elsewhere on the body in the contagious sense, the underlying cause (like allergies or fleas) can certainly trigger new hot spots in other areas. Also, if left untreated, a single hot spot can rapidly increase in size.
5. What do hot spots look like as they heal?
As a hot spot heals, the oozing will stop, the redness will decrease, and a dry scab will form over the lesion. The area will shrink in size, and eventually, the scab will fall off, leaving behind healthy new skin. Hair will then start to regrow from the edges inward.
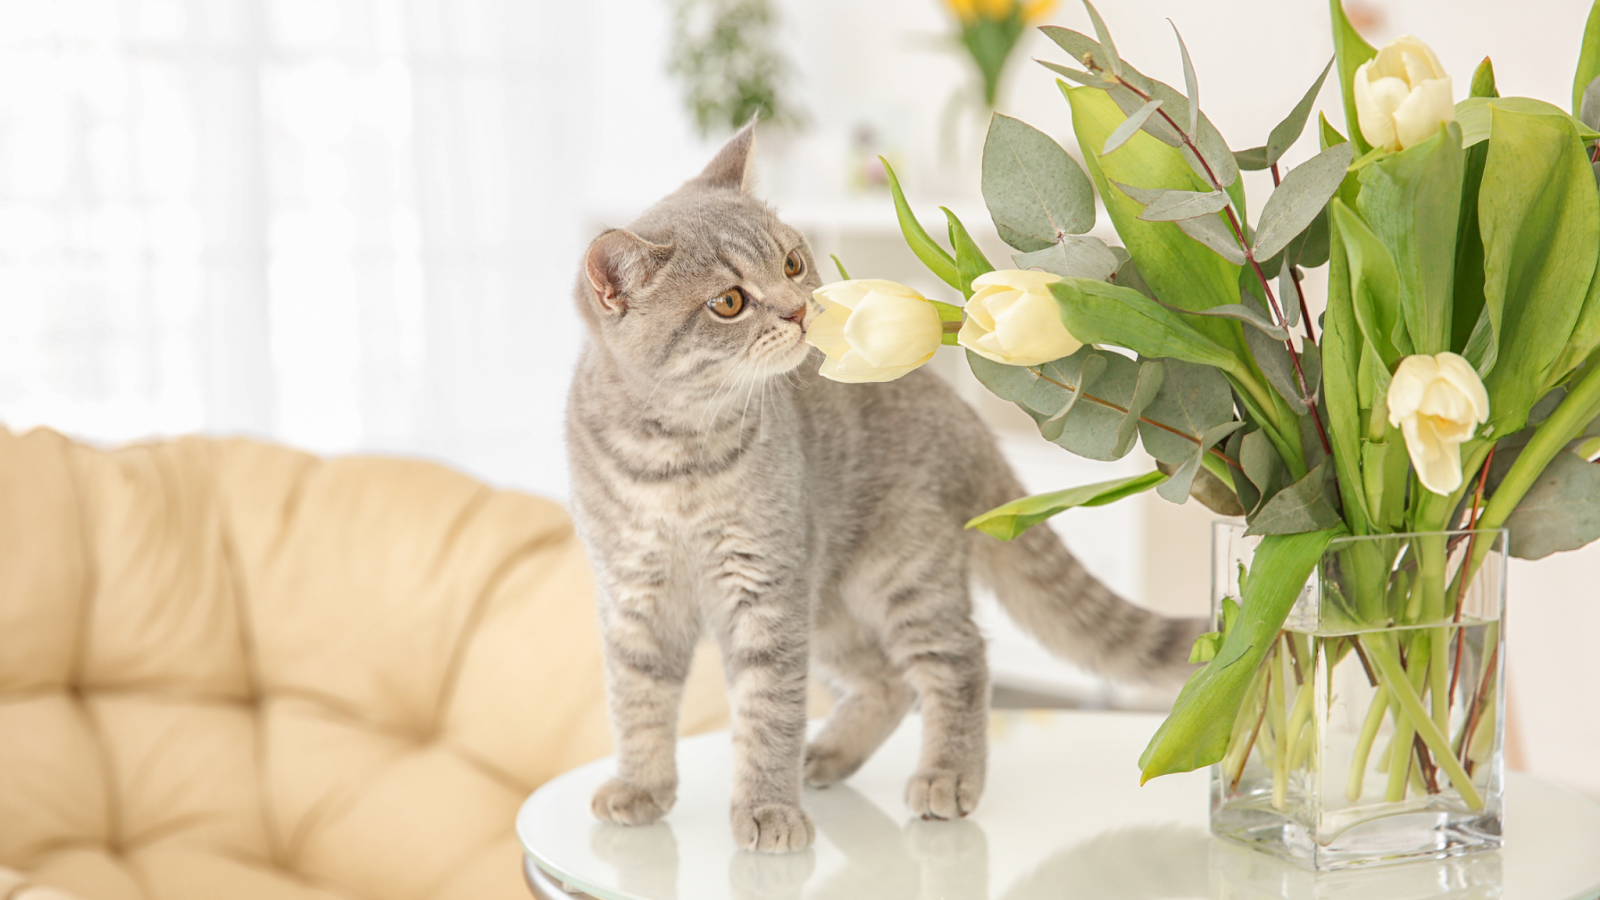
Cats are naturally curious creatures, and many love to nibble on plants and flowers. While some flowers add beauty to your home or garden, others could spell disaster for your feline friend. A ASPCA report found that over 5,000 plant-related toxicity cases in pets were due to common household flowers . It’s essential for pet parents to understand what flowers are poisonous to cats to avoid emergency vet visits or worse.
In this blog, we’ll explore the top 10 dangerous flowers, break down their harmful effects, and give you tips to keep your kitty out of harm’s way. Whether you’re a seasoned cat owner or a new pet parent, this guide is packed with everything you need to know.
Quick Overview of Toxic Flowers for Cats
Flower Name
Toxic Part(s)
Symptoms in Cats
Requires Vet Attention
Lily
All parts
Vomiting, kidney failure
Yes
Oleander
Leaves, stems, flowers
Heart issues, tremors
Yes
Tulip
Bulbs
Drooling, diarrhea
Yes
Daffodil
Bulbs, leaves
Nausea, convulsions
Yes
Chrysanthemum
All parts
Skin irritation, salivation
Sometimes
Hyacinth
Bulbs
Vomiting, tremors
Yes
Autumn Crocus
Entire plant
Bloody vomiting, liver damage
Yes
Azalea
Leaves, flowers
Weakness, coma
Yes
Sago Palm
Seeds (nuts)
Liver failure, death
Yes
Foxglove
All parts
Irregular heartbeat
Yes
1. Lilies – The Ultimate Threat to Felines
Lilies top every vet’s list when asked what flowers are poisonous to cats. Varieties like Easter, Tiger, Asiatic, and Day lilies are especially lethal. Every part of the plant—from the petals to the pollen—is highly toxic to cats.
Even brushing against a lily and licking their fur later can cause severe kidney failure within 24–72 hours. If ingestion is suspected, immediate vet intervention is crucial. There’s no antidote—only early aggressive treatment can help.
Oleander may look beautiful in landscapes, but it’s a ticking time bomb for cats. Found mostly outdoors, this flowering shrub contains cardiac glycosides, which can affect heart rhythm.
Ingesting oleander can lead to vomiting, drooling, slow heart rate, seizures, and even death. If you have a cat that roams, ensure there’s no oleander nearby.
3. Tulips – Spring’s Sneaky Hazard
Tulips are a favorite spring bloom, but their bulbs contain tulipalin A and B, compounds toxic to cats. While the flower tops may not be as dangerous, the bulbs are where the real risk lies.
Symptoms include drooling, diarrhea, loss of appetite, and lethargy. Severe cases may require supportive therapy and IV fluids at the vet clinic.
4. Daffodils – Not Just a Bright Yellow Warning
Like tulips, daffodil bulbs are the main culprits here. They contain lycorine, an alkaloid known for causing intense vomiting, abdominal pain, and even heart rhythm problems in cats.
Keep both indoor arrangements and garden bulbs well out of reach of curious kitties.
5. Chrysanthemums – Pretty But Problematic
Chrysanthemums (or mums) are often considered safe by many, but they can still pose risks. They contain pyrethrins, a compound also used in insecticides.
While rarely deadly, ingestion can cause drooling, vomiting, and skin irritation. Long-haired cats are especially at risk due to pollen sticking to their fur.
Flower Parts That Are Most Toxic to Cats
Flower
Most Toxic Part
Risk Level
Lily
Pollen, leaves, stem
Severe
Oleander
Leaves and flowers
Severe
Tulip
Bulb
Moderate
Daffodil
Bulb
High
Chrysanthemum
All parts
Moderate
Hyacinth
Bulb
High
Autumn Crocus
Entire plant
Severe
Azalea
Leaves and flowers
High
Sago Palm
Seeds
Severe
Foxglove
Entire plant
Severe
6. Hyacinths – Toxic Springtime Beauties
Hyacinths, like tulips and daffodils, are toxic in the bulb form. They contain oxalate crystals that cause severe oral pain, drooling, vomiting, and diarrhea.
They’re especially dangerous when planted indoors in water or containers, where cats can easily nibble on them.
Autumn Crocus contains colchicine, a toxic alkaloid that can cause symptoms hours or even days after ingestion. Common signs include bloody vomiting, diarrhea, liver and kidney damage, and bone marrow suppression.
Immediate veterinary care is essential, as symptoms worsen rapidly and can be fatal.
8. Azaleas – Beautiful But Deadly
Azaleas belong to the Rhododendron family and contain grayanotoxins. These interfere with muscle and nerve function.
Symptoms of ingestion include drooling, vomiting, diarrhea, muscle weakness, and potential coma. Just a few leaves can be dangerous for a small cat.
9. Sago Palm – The Exotic Danger
Sago Palm might not be a traditional “flower,” but it’s too deadly not to include. The seeds (nuts) are most toxic and can lead to liver failure and death even in small doses.
Early symptoms include vomiting, black-tarry stool, jaundice, and neurological signs like tremors and seizures. Immediate emergency vet care is a must.
10. Foxglove – The Heart Stopper
Foxglove looks like something out of a fairy tale, but its beauty hides its danger. It contains digitalis glycosides, compounds used in heart medication.
If a cat chews on foxglove, it may suffer from slow or irregular heartbeat, vomiting, diarrhea, and collapse. There’s no home remedy—only vet care can help.
Symptoms to Watch If Your Cat Ingests a Poisonous Flower
Symptom
Indicates Possible Poisoning From
Vomiting or diarrhea
Tulip, Daffodil, Azalea
Drooling and oral pain
Hyacinth, Chrysanthemum
Lethargy or weakness
Lily, Foxglove, Oleander
Jaundice or liver damage
Sago Palm, Autumn Crocus
Irregular heartbeat
Foxglove, Oleander
Coma or seizures
Azalea, Oleander, Autumn Crocus
How to Protect Your Cat from Toxic Flowers
Keep flowers out of reach or avoid keeping them indoors altogether.
Read plant labels when buying bouquets or garden plants.
Use cat-friendly alternatives like spider plants, wheatgrass, or catnip.
Train your cat to avoid houseplants using scent deterrents.
Pro Tip:
If you love flowers and have a cat at home, go artificial or opt for non-toxic blooms like roses, sunflowers, or orchids. That way, you enjoy the beauty without risking your kitty’s health!
Pet photography is more than just taking a photo, it’s about celebrating your furry friend and creating memories you’ll cherish forever. Whether you’re a professional or an amateur, the right approach can turn a simple photoshoot dog session into a masterpiece.
What Makes Pet Photography Unique?
Unlike human photography, pets are unpredictable. Their spontaneity and raw emotions, however, make every shot genuine and heartwarming. Capturing these candid moments is the essence of pet photography.
Essential Equipment for Pet Photography
Cameras and Lenses Invest in a DSLR or mirrorless camera with fast autofocus. A prime lens (like 50mm) ensures clear portraits, while a zoom lens is perfect for action shots during a photoshoot dog session.
Tripods and Lighting Tools A tripod helps stabilize your camera for sharp images. For lighting, natural light works wonders, but softboxes or reflectors are great indoors.
Pet Photography Tips
Focus on the Eyes: The eyes are the window to the soul, even for pets. Keep the eyes sharp and expressive.
Use Continuous Shooting Mode: Pets move a lot! A burst mode increases your chances of getting the perfect shot.
Keep it Natural: Let your pet be themselves. Forced poses can look unnatural.
Get Down to Their Level: Shooting from your pet’s perspective adds a more personal touch.
Every pet is unique. Whether your dog loves playing fetch or prefers lounging, incorporate their personality into the photoshoot. Highlighting their quirks makes your photos authentic and personal.
Preparation Tips for Pet Photography
Grooming Your Pet A clean, brushed coat enhances your pet’s appearance in photos. For a professional dog photoshoot, a quick dog bath and brushing session can make a big difference.
Creating a Comfortable Environment Use familiar toys and treats to create a relaxed atmosphere. Reducing stress ensures better poses and more candid moments.
Choosing the Right Location
Indoor Setups Set up near a large window for soft, natural light. Use neutral or textured backdrops to make your pet stand out.
Outdoor Spots Parks or beaches are perfect for action shots and dynamic poses. Early morning or late afternoon light works best for outdoor photoshoot dog sessions.
Natural light minimizes harsh shadows and highlights fur details. If indoors, position your pet near windows. For evening shoots, use warm-toned artificial lights to avoid cold, unnatural colors.
How to Make Pets Comfortable During the Photoshoot
Patience is your biggest ally. Start with playtime to build trust and comfort. Treats and toys act as excellent motivators to keep your pet engaged during the photoshoot dog session.
Action Shots Use a fast shutter speed to capture your dog in motion, whether running or playing. These shots are vibrant and full of life.
Posed Shots Create a cozy setup with blankets or props. Professional dog photos often feature styled poses that highlight elegance or cuteness.
Composition Techniques for Pet Portraits
Rule of Thirds: Position your pet slightly off-center for a balanced composition.
Creative Angles: Experiment with close-ups or wide shots to add variety to your pet photography collection.
Photoshoot Dog: Making It Memorable
A photoshoot dog session should feel fun and rewarding. Use squeaky toys to grab attention, and keep the atmosphere lighthearted. Your goal is to capture their unique essence in a relaxed and enjoyable way.
Editing and Enhancing Pet Photos
Editing Tools
Features
Adobe Lightroom
Adjust brightness and color tones
Snapseed
Easy-to-use for mobile editing
Editing enhances the details, from fur texture to background lighting. Focus on sharpening, brightening, and cropping for a professional finish.
Common Mistakes to Avoid in Pet Photography
Ignoring Lighting Proper lighting ensures sharp, vibrant photos. Avoid shooting in dim or overly bright conditions.
Rushing the Shoot Patience is key. Take your time to capture the perfect expression or pose.
Conclusion
Pet photography is an art and a labor of love. Whether you’re capturing playful action shots or elegant portraits, the goal is to reflect your pet’s personality and the bond you share. With these tips and tricks, your next “photoshoot dog” session will be a memorable one.
Cats have a powerful sense of smell—about 14 times stronger than humans. So when you wonder what scents do cats hate, you’re tapping into one of their most defining traits. From citrus to vinegar and even essential oils, some odors make your cat run the other way!
According to a study by VCA Animal Hospitals, a cat’s nose has over 200 million scent receptors compared to only 5 million in humans. Understanding the specific smells cats hate not only helps you protect areas of your home but also keeps your kitty safe from potentially harmful substances.
Why Understanding Feline Scent Aversions Is Important
You love your cat—but you might not love when it scratches furniture or jumps on countertops. That’s where knowing what scents do cats hate comes in handy. Using these scents as natural deterrents can protect both your belongings and your pet without harsh chemicals or punishments.
How Cats Perceive Smells
The Feline Olfactory System Explained
Cats rely heavily on their sense of smell for navigation, communication, and survival. They have a vomeronasal organ (Jacobson’s organ) on the roof of their mouths that enhances their scent detection. This means certain odors that seem mild to you may feel overwhelming—or even toxic—to them.
How Smell Impacts Feline Behavior
A cat’s reaction to scent isn’t just about dislike. Some smells can cause anxiety, avoidance, or even aggression. That’s why using scent-based repellents should always be done with care.
Citrus smells like lemon, orange, and lime are at the top of the “cats hate this” list. The acidity and overpowering aroma irritate their sensitive noses and can even cause sneezing or stress.
Common Household Products with Citrus
Product
Citrus Ingredient
Cat-Safe?
Natural surface cleaners
Lemon or orange oil
No
Air fresheners
Citrus essence
No
Essential oils
Lemon extract
Definitely not
2. Vinegar
Strong Acidity Cats Can’t Stand
The pungent, tangy scent of vinegar is naturally repulsive to cats. It overwhelms their olfactory senses and makes it a great choice for deterring scratching or marking.
Safe Ways to Use Vinegar as a Repellent
Mix equal parts white vinegar and water in a spray bottle and mist furniture or baseboards. Avoid spraying it directly on your cat, of course!
3. Essential Oils
Which Essential Oils Are Toxic to Cats
Essential oils like tea tree, eucalyptus, peppermint, and cinnamon can be extremely toxic. Even inhaling them in diffused air can cause liver issues or respiratory distress.
Why Diffusers Can Be Harmful
Diffusers aerosolize oil particles, which cats can inhale. Since cats groom themselves constantly, particles landing on fur also get ingested.
4. Eucalyptus and Menthol
Cooling Scents That Irritate Cats
What’s refreshing to us—like menthol and eucalyptus—is overwhelming for cats. These ingredients are found in chest rubs, muscle balms, and some floor cleaners.
Risks and Safety Precautions
Always store such products out of reach and never use them to clean litter areas or feeding spots.
5. Bananas
Enzyme Content That Repels Cats
Cats dislike the smell of bananas because of an enzyme called ethyl acetate in the peel, which releases a strong chemical scent.
Use of Banana Peels as Deterrents
Placing banana peels in potted plants or corners can keep cats away—but swap them out before they rot!
Though lavender helps humans unwind, it can make cats anxious or irritated. Some cats even experience nausea around dried lavender sachets.
Toxicity Concerns with Lavender
Lavender contains linalool, a compound toxic to cats if consumed or inhaled in large quantities.
7. Pepper and Spicy Scents
Capsaicin and Its Strong Reaction in Cats
Spicy scents like chili or black pepper cause immediate discomfort. Capsaicin, the compound responsible for the heat in peppers, can irritate a cat’s nasal passages and skin.
Dangers of Spicy Deterrents
Avoid sprinkling pepper flakes directly; they may cause painful reactions in paws or eyes.
8. Pine and Cedar
Woodsy Scents That Don’t Sit Well with Felines
Although some cat litters include pine or cedar, not all cats tolerate these well. The natural oils can be irritating and even toxic.
Litter Box and Cleaning Product Warnings
Make sure your pine or cedar litter is kiln-dried and chemical-free. Avoid cleaners with added pine fragrance.
9. Dirty Litter Boxes
Natural Aversion to Soiled Environments
Cats are clean creatures. A dirty litter box can repel them not just from the box, but from the entire room!
How to Keep Your Cat’s Litter Area Clean
Scoop daily
Replace litter every week
Wash box monthly with fragrance-free soap
Table: Summary of Scents Cats Hate and Why
Scent
Why Cats Hate It
Safe Use?
Citrus
Too acidic and overwhelming
Yes, with dilution
Vinegar
Strong tangy smell irritates
Yes
Essential Oils
Toxic when inhaled or ingested
No
Eucalyptus
Irritating and possibly toxic
No
Bananas
Enzyme-based chemical odor
Yes
Lavender
Contains linalool, can be toxic
With caution
Pepper
Capsaicin causes discomfort
No
Pine/Cedar
Natural oils can be irritating
Only chemical-free
Dirty Litter
Bacteria and ammonia smell
N/A – just clean it!
Natural Cat Repellent Recipe Using Hated Scents
Here’s a safe and effective homemade spray to keep cats away from certain areas:
Ingredients:
1 cup water
1 tbsp lemon juice
1 tbsp white vinegar
5 drops of citronella essential oil (optional and use with caution)
Mix and spray lightly around baseboards, furniture legs, and plant pots.
While most scents just repel, some—like essential oils, lavender, and menthol—can harm cats if used improperly. Always err on the side of caution and consult your vet if unsure.
How to Use These Smells Effectively and Safely
Always dilute strong substances like vinegar or lemon juice.
Avoid direct contact with fur, food, or litter.
Test small areas first to make sure your cat doesn’t overreact.
Common Myths About What Scents Do Cats Hate
Myth: All cats hate lavender. Truth: Some tolerate it, but most dislike it.
Myth: Citrus peels are enough. Truth: They dry out quickly and lose scent potency.
Conclusion
So, what scents do cats hate? Turns out—quite a few! Citrus, vinegar, lavender, and more can all act as safe deterrents when used carefully. But remember, every cat is different. What drives one cat up the wall might not faze another. Start slow, test safely, and always choose the most humane way to redirect unwanted behavior.
Pro Tip for Cat Owners
Instead of relying solely on aversive smells, combine scent deterrents with positive reinforcement. For every “No” scent zone, create a “Yes” area with toys, catnip, or a cozy bed!
Do you often find yourself wondering how to calm down a hyper dog? You’re not alone. Hyperactivity in dogs is a common challenge for many pet parents. Whether it’s a puppy bouncing off the walls or an adult dog with boundless energy, understanding the reasons behind their hyper behavior and knowing how to manage it is crucial. This guide will walk you through practical techniques, address common questions like why is my dog so hyper, and help you learn how to train a hyper dog for a calmer, more enjoyable relationship.
Why Is My Dog So Hyper?
Before jumping into solutions, it’s essential to understand the reasons behind your dog’s hyperactivity. Here are some possible causes:
Cause
Description
Breed Traits
Some breeds, like Border Collies and Jack Russells, are naturally energetic.
Lack of Exercise
Insufficient physical activity can lead to pent-up energy and restlessness.
Poor Diet
High-sugar or low-quality foods can affect behavior and increase hyperactivity.
Age
Puppies and young dogs often have more energy as they’re still developing.
Lack of Mental Stimulation
Dogs need mental engagement, or they may act out to alleviate boredom.
Anxiety or Stress
External stressors, like loud noises or separation anxiety, can manifest as hyperactivity.
Understanding the “why” is the first step in learning how to calm a hyper dog. Now, let’s dive into practical tips.
While addressing how to calm down a hyper dog, it’s important to steer clear of these mistakes:
Punishing Hyperactivity: This can lead to fear or anxiety, making the behavior worse.
Inconsistent Routines: Dogs thrive on structure. Stick to set times for walks, meals, and play.
Overlooking Health Issues: If your dog’s hyperactivity is sudden or extreme, consult a vet to rule out underlying conditions.
When to Seek Professional Help
If you’ve tried the above methods and your dog remains excessively hyper, it may be time to consult:
A Veterinarian: To check for medical causes.
A Dog Trainer or Behaviorist: For specialized training techniques.
Conclusion
Managing a hyper dog takes patience, consistency, and understanding. By addressing their physical, mental, and emotional needs, you can learn how to calm down a hyper dog effectively. Whether you’re working with a puppy or an adult dog, these tips will set you on the path to success.
For South Florida pet parents looking for grooming services for their energetic dogs, PURRFECT GROOMING offers mobile grooming that fits seamlessly into your schedule. A calm, clean dog is just a booking away! Reach out to us today for top-notch grooming and care.
Hyperactivity in dogs can result from several factors, including lack of exercise, breed tendencies, poor diet, anxiety, or boredom. Puppies and young dogs are naturally more energetic than older dogs.
2. How can I calm a hyper dog quickly?
Quick methods to calm a hyper dog include taking them for a brisk walk, giving them a puzzle toy to engage their mind, or using calming aids like sprays or pheromone diffusers. A calm environment and soothing tone of voice also help.
3. What is the best way to train a hyper dog?
Positive reinforcement is the most effective training method for hyper dogs. Reward calm behaviors with treats or praise, ignore excitable behaviors, and practice commands consistently. Regular exercise is also key to reducing hyperactivity.
4. How do I calm a hyper puppy?
Puppies need structured playtime, plenty of rest, and gentle training. Introduce calming activities, such as short training sessions, chew toys, and quiet time in a designated area. Patience is essential as they mature.
5. Can diet affect my dog’s hyperactivity?
Yes, diet can significantly impact your dog’s energy levels. High-sugar, low-quality, or overly processed foods may contribute to hyperactivity. Switch to a high-quality, balanced diet to promote better behavior and overall health.
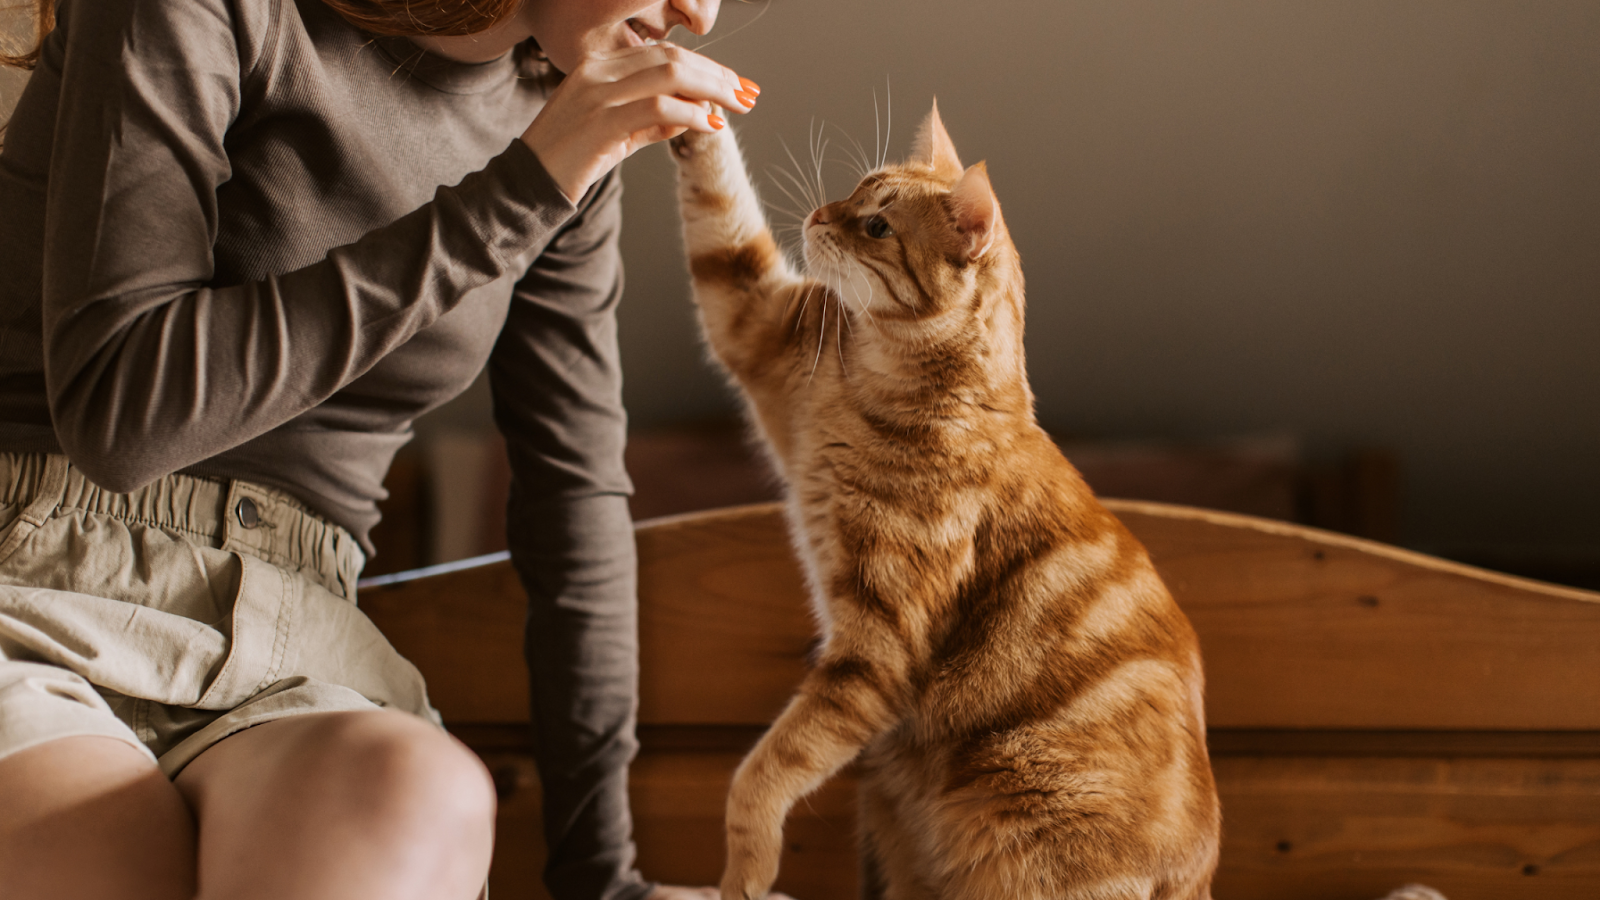
Training your cat isn’t about turning your tabby into a circus performer. It’s about fostering communication, strengthening your bond, and creating a more harmonious home. According to the American Pet Products Association, over 45.3 million U.S. households own a cat, but many cat parents never consider training their feline friends. The result? Scratched furniture, litter box rebellion, or mysterious 2 A.M. zoomies.
The good news? Cats are way smarter than most people give them credit for. In fact, studies from Kyoto University have shown cats recognize their owners’ voices and can even learn to follow commands with consistency . With the right approach, a little patience, and some delicious treats, you can train your cat to behave better, listen more, and maybe even show off a trick or two.
Understanding Your Cat’s Behavior
Before you jump into training, take a moment to get into the feline mindset. Cats are independent creatures, ruled by instincts. They’re territorial, cautious, and communicate in subtle ways—through body language, vocal cues, and behavior.
Understanding why your cat does what it does is key to solving issues. Is your cat scratching the sofa? It’s not rebellion; it’s marking territory and maintaining claw health. Is your cat refusing the litter box? There may be a stress trigger or hygiene issue.
Training isn’t just teaching commands—it’s solving mysteries. When you observe patterns and decode your cat’s motives, your training will become way more effective.
Absolutely! While cats aren’t as eager to please as dogs, they are highly intelligent and trainable. The trick is motivation. Cats need a reason to respond—usually food, praise, or play. Unlike dogs, they don’t follow commands for approval. So, training a cat is more like negotiating with a clever, opinionated roommate.
Tools You’ll Need to Start Training
Getting your toolkit ready makes a big difference in training success. Here’s what you’ll need:
Tool
Purpose
Best Practice
Clicker
For clicker training
Use consistently after desired action
Treats
Reward-based motivation
Use soft, strong-smelling treats
Target Stick
Guide your cat’s movement
Combine with clicker for tricks
Litter Box Scoop
Cleanliness aids training
Scoop daily to avoid litter issues
Scratching Post
Redirect destructive behavior
Place near problem areas
Harness & Leash
For leash training
Start indoors in safe spaces
Setting Realistic Expectations
Don’t expect your cat to become a perfect pet overnight. Cats learn best in short sessions—5 to 10 minutes, max. Be consistent, use the same cues, and celebrate small victories. Always remember, progress may not be linear.
For example, your cat might learn to sit one day and forget it the next. This is normal! Just stay calm and keep training sessions fun and positive. Your cat’s willingness will improve with trust and repetition.
Litter Box Training Done Right
Most kittens naturally use the litter box thanks to their instincts, but accidents can happen. Ensure the box is:
Easily accessible
In a quiet, private location
Cleaned daily
Large enough for your cat
If your cat is eliminating outside the box, ask yourself:
Did I change the litter brand?
Is the box too close to the food bowl?
Is it covered (some cats hate that)?
Also, remember to reward your cat with treats and gentle praise right after using the box correctly. Don’t punish accidents—just clean with an enzymatic cleaner and adjust your setup.
Cats need to scratch—it’s instinct. Instead of yelling when they destroy your couch, give them better options.
Step-by-Step:
Choose a sturdy, tall post (cats love vertical scratching).
Place it near where your cat already scratches.
Rub catnip on it to attract them.
When they use it, click and reward.
If they scratch elsewhere, gently move them to the post.
Mistake to Avoid
Why It’s a Problem
Using small posts
Doesn’t match natural scratching
Yelling or spraying
Causes fear, not learning
Inconsistent training
Confuses your cat
How to Train a Cat to Sit or Stay
Yes, cats can sit or stay! Use a clicker and high-value treats to teach this simple but useful command.
Training ‘Sit’:
Hold a treat above their head.
As they look up, they’ll naturally sit.
Click and reward as soon as their butt touches the ground.
Repeat 2–3 times a day.
Training ‘Stay’:
Ask them to sit.
Wait 1 second, then reward.
Gradually increase time before clicking.
Add the cue “stay” and step away slightly.
Consistency is key. Cats love routines, so doing this daily reinforces memory.
Clicker Training: The Magic Behind the Sound
Clicker training works wonders because it gives instant feedback. The “click” marks the exact moment your cat does something right, followed by a reward.
Start by “charging the clicker”: click, then treat—do this several times until your cat connects the sound to rewards. Then use it to reinforce behavior like:
Coming when called
High-fiving
Touching targets
Sitting
You can build entire routines using just a clicker and patience.
Punishment doesn’t work with cats—it damages trust and increases anxiety. Instead, focus on redirection and reward-based systems.
Common issues and redirection tips:
Behavior
Cause
Fix
Scratching furniture
Territory marking
Provide better scratching options
Jumping on counters
Curiosity, hunting instinct
Use double-sided tape or training mats
Biting during play
Overstimulation
Stop play, give chew toys instead
Instead of yelling or spraying, teach your cat what you do want them to do—and reward that behavior generously.
Socializing Shy or Anxious Cats
Not all cats are social butterflies. Some need gentle coaxing to feel safe around people. Start slow:
Sit quietly in the room without forcing contact
Use food and toys to build positive associations
Let them come to you on their terms
Avoid sudden moves or loud sounds
With time, consistency, and a safe environment, shy cats can blossom into confident companions.
Teaching Cats to Walk on a Leash
Leash training can be a game-changer—offering stimulation and exercise. Start with a lightweight harness indoors. Let your cat wear it for short periods, then attach the leash.
Gradually introduce outdoor time in a secure, quiet area. Use treats and encouragement throughout.
Don’t drag or rush—this should be a fun adventure, not a forced march.
Reinforcing Good Habits with Positive Reinforcement
Positive reinforcement is the golden rule in cat training. Always reward behaviors you want to see again.
Tips:
Use varied rewards: food, praise, play
Be immediate with the reward
Keep sessions upbeat and short
Never punish mistakes—just redirect
When training feels like play, your cat will be eager to participate.
Training Multiple Cats at Once
Each cat has its own pace and personality. Train one at a time in a separate room to avoid distractions or competition.
Make sessions individual and short. Track progress separately, and reward based on effort—not comparison.
Cat Training Mistakes to Avoid
Avoid these common mistakes:
Mistake
Why It’s Harmful
Punishing mistakes
Breeds fear and confusion
Long training sessions
Cats lose interest fast
Using low-value treats
Doesn’t motivate learning
Ignoring body language cues
Causes stress or frustration
Conclusion: Training a Cat Is Possible—and Worth It
Cat training isn’t just possible—it’s rewarding. Whether you’re aiming for basic obedience, correcting annoying habits, or just deepening your bond, a trained cat is a happier cat. With the right mix of patience, tools, and techniques, you’ll be amazed at what your feline friend can learn. Stick with it, be kind, and enjoy the journey.
Ever wonder why do cats hate water so much? You’re not alone. It’s a question that has puzzled cat lovers for generations. While it may seem like your feline friend is just being difficult, there’s actually science and history behind it.
According to a study by the National Research Council, cats have low water requirements due to their desert ancestry, meaning they rarely needed to interact with water in the wild. This evolutionary trait, combined with their sensitive nature, explains a lot.
So, let’s dive deep (pun intended!) into the reasons behind this quirky behavior. Whether you’re a new cat parent or a seasoned one, understanding this can help you care for your pet better.
The Evolutionary Roots of Water Aversion
Origins in Desert Climates
Cats descended from desert-dwelling felines like the African Wildcat. These environments had scarce water, so cats naturally evolved with minimal need for bathing or swimming.
Wild Ancestors and Water Avoidance
In the wild, cats avoided water bodies that could contain predators or trap them. Unlike canines, they weren’t pack animals with communal grooming habits that involved water.
Extreme temperatures can startle cats. Always use lukewarm water and test it first.
Calming Scents and Gentle Handling
Lavender-scented sprays and calm handling can reduce anxiety. Use a cup to pour water instead of a noisy tap.
Tips to Help Your Cat Get Used to Water
Start Young and Go Slow
Introduce your cat to damp cloths or small water bowls early. Don’t dunk them—gradual exposure works best.
Reward-Based Desensitization
Use treats, praise, and play after any interaction with water to build positive associations.
Alternatives to Traditional Bathing
Waterless Shampoos
These are great for quick cleaning without trauma. Just rub in and wipe off—no rinse needed.
Grooming Wipes and Brushes
Ideal for cats who resist bathing. Keeps fur clean and free of oils, dander, and debris.
Why Understanding Water Aversion Matters
Building Trust with Your Cat
Forcing water interactions can break trust. A respectful approach ensures a happier, healthier relationship.
Avoiding Unnecessary Stress
A stressed cat may develop behavioral problems. Understanding their limits is essential for their well-being.
Final Thoughts
Embracing Your Cat’s Preferences
Every cat is unique. Some might tolerate water, others may hate it. What matters is understanding and respecting their comfort zones.
Don’t Force, Just Understand
Instead of trying to change your cat, work around their dislikes. It’ll make life easier for both of you.
Pro Tip of the Day
Always keep a soft towel, lukewarm water, and treats handy if you’re attempting to bathe your cat. But remember—if your cat absolutely hates water, it’s not a battle worth fighting. Try dry alternatives instead.
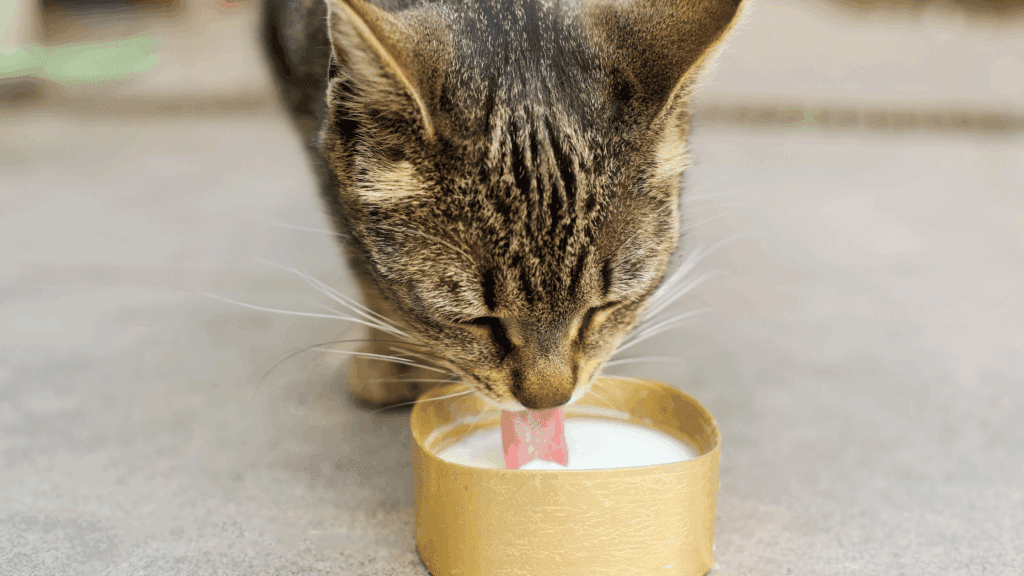
It’s one of the most iconic images we associate with felines: a cat happily lapping milk from a saucer. But here’s the truth—can cats have milk? In most cases, they absolutely should not. While the scene is charming, the science tells a much different story.
According to the American Society for the Prevention of Cruelty to Animals (ASPCA), most adult cats are lactose intolerant, and consuming milk can lead to digestive upset, including bloating, gas, and diarrhea. In fact, a study from the Journal of Animal Science found that over 65% of adult cats lack sufficient lactase, the enzyme needed to break down lactose found in milk.
Despite the enduring myth, milk is neither necessary nor particularly safe for most cats. Understanding why this misconception exists and what it means for your pet’s health is crucial. This article takes a deep dive into the myths, science, and safe practices surrounding dairy and your cat’s diet.
The Cultural Obsession with Cats and Milk
We’ve all seen it in movies, storybooks, and even cartoons: cats being offered bowls of milk as a sign of love and care. This longstanding association isn’t accidental.
Where the Image Came From
Historically, on farms, barn cats would lap up leftover milk after milking sessions.
This access led to the idea that milk was a cat’s treat of choice.
Media reinforced this perception, especially in children’s books and animated shows.
Why It Stuck Around
The action of a cat drinking from a bowl looks endearing and nurturing.
Generational habits made milk a “go-to” treat.
Lack of awareness about lactose intolerance in cats contributed to misinformation.
However, what’s cozy for us might be chaos for your cat’s digestion.
Many cat owners are shocked to learn that their feline companions often lack the necessary enzyme (lactase) to properly digest the lactose in milk.
What Happens When a Cat Drinks Milk?
Undigested lactose ferments in the intestines.
This can lead to gas, bloating, and stomach cramps.
Symptoms may include vomiting, diarrhea, and lethargy.
Differences Between Kittens and Adult Cats
Kittens produce lactase while nursing from their mothers.
By 8–12 weeks of age, lactase production significantly drops.
Most adult cats become lactose intolerant as part of natural development.
Health Consequences of Feeding Milk to Cats
Let’s break down the specific health risks your cat may face when regularly consuming milk:
Short-Term Effects
Acute diarrhea or loose stools
Stomach pain or visible bloating
Lethargy and irritability
Long-Term Effects
Dehydration from chronic diarrhea
Malnutrition due to nutrient imbalance
Weight gain and obesity from milk fat
Table: Health Risks by Milk Type
Milk Type
Risk Level
Common Symptoms
Cow’s Milk
High
Diarrhea, vomiting, gas
Goat’s Milk
Moderate
Some digestion issues, not ideal long-term
Lactose-Free Milk
Low
Safe in moderation
Plant-Based Milks
High
Contains oils/additives harmful to cats
Can Kittens Drink Milk? A Critical Distinction
Many new pet owners make the mistake of feeding cow’s milk to kittens, thinking it’s a suitable replacement for their mother’s milk. This can be dangerous.
Cow’s Milk vs. Mother’s Milk
Mother’s milk is biologically tailored to kittens’ needs.
Cow’s milk has lower protein and fat content compared to feline milk.
It can cause serious digestive upset and malnutrition.
Best Alternatives for Orphaned Kittens
Kitten Milk Replacer (KMR): Vet-recommended and nutritionally balanced.
Goats’ milk (diluted): Acceptable for short periods, but not ideal.
Nutritional Comparison
Nutrient
Feline Mother’s Milk
Cow’s Milk
Kitten Formula
Protein
High
Medium
High
Fat
High
Low
Moderate
Lactose
Low
High
Very Low
Digestibility
Excellent
Poor
Excellent
What About Dairy Products Like Yogurt or Cheese?
Not all dairy is created equal. While liquid milk is often a no-go, some fermented dairy products may be tolerated in small amounts.
Cheese
Aged cheeses like cheddar or Swiss have less lactose.
Small bites can be given occasionally, but watch for reactions.
Yogurt
Plain, unsweetened yogurt contains live cultures that may aid digestion.
Avoid flavored or fruit-added yogurts due to sugar and artificial sweeteners.
Butter and Cream
Both are high in fat and low in nutritional value.
Cats may not always show immediate reactions, so it’s important to observe subtle signs that could suggest dairy intolerance.
Symptoms to Watch For
Loose stools or diarrhea
Excessive gas or bloating
Vomiting within a few hours after drinking milk
Reduced energy levels or hiding behavior
Unusual thirst (a sign of dehydration)
When to Visit a Vet
Persistent gastrointestinal distress
Blood in stool or vomiting
Signs of dehydration (dry gums, sunken eyes)
What Do Cats Really Need in Their Diet?
Cats are obligate carnivores, which means their diet should consist primarily of meat. Milk, in contrast, is rich in sugar and lacks essential feline nutrients.
Essential Nutrients for Cats
Taurine: Found in animal tissues; vital for heart and eye health.
Protein: Supports muscle development and energy.
Fatty acids: Maintains healthy skin and coat.
Vitamins A, B, and D: Supports immune and organ function.
Hydration: Why Milk Is Not a Substitute for Water
Many cat owners think of milk as a hydrating treat. In reality, it can do more harm than good, especially if your cat drinks less water because of it.
Best Hydration Sources
Clean, fresh water: Changed daily and accessible at all times.
Wet cat food: Contains up to 75% moisture.
Homemade meat broths (unsalted): Tasty and hydrating.
Introduce wet food that contains high moisture content.
Healthier Treat Options
Freeze-dried liver treats
Chopped cooked chicken or turkey
Pet-safe broth cubes
Real Owner Stories and Testimonials
Sophie’s Story: The Constant Cleanup
“I used to think I was spoiling my tabby by giving her warm milk every night. Turns out I was causing her chronic diarrhea. Once I stopped, the problem disappeared.”
James’ Experience: The Healthy Switch
“My cat loved milk but suffered frequent vomiting. We switched to lactose-free cat milk, limited to once a week. She’s healthier and happier now!”
Recap: What’s Safe, What’s Not
Product
Safe?
Frequency
Notes
Cow’s Milk
❌
Never
High lactose, causes digestive issues
Goat’s Milk (Diluted)
⚠️
Rare Treat
Low lactose but not ideal long-term
Lactose-Free Cat Milk
✅
Occasionally
Designed for cats, safe in moderation
Yogurt (Plain, Unsweetened)
✅
Small Amounts
Check for added sugars or flavors
Plant-Based Milks
❌
Avoid Completely
Additives can be toxic to cats
Conclusion: So… Can Cats Have Milk?
To wrap it up: can cats have milk? The majority of the time, no—they can’t and shouldn’t. Milk may seem like a harmless treat, but it often brings more discomfort than delight. From digestive issues to nutritional imbalances, the risks outweigh the fleeting pleasure.
If you’re keen to offer something creamy, stick to lactose-free alternatives made specifically for cats. Better yet, invest in their long-term health by sticking to a balanced, meat-based diet and plenty of clean water. Your furry companion deserves a life of wellness—not one interrupted by tummy troubles.
Pro Tip for Cat Owners
Want to pamper your cat without the risks of milk? Try blending a teaspoon of tuna water or plain chicken broth into their food. It’s tasty, safe, and full of hydration benefits—plus, it avoids the digestive disaster that dairy can bring.
If you’re wondering how to get rid of cat pee smell, you’re not alone. Cat urine is one of the most pungent, stubborn odors to eliminate — and it gets worse the longer it lingers. Cat pee odor doesn’t just affect your comfort; it can even devalue your home if left untreated. And let’s be honest — no one wants their house to smell like a litter box. That’s why this guide explores effective, science-backed ways to eliminate the stench for good.
According to a study published by the National Institutes of Health, the main compound that causes the powerful odor, felinine, breaks down into sulfur-containing compounds over time, making the smell significantly more intense.
Why Cat Urine Smells So Strong
Composition of Cat Urine
Cat pee contains urea, uric acid, creatinine, and ammonia. The uric acid crystals are not water-soluble, which is why the smell can linger long after the liquid has dried.
Bacteria Make It Worse
Bacteria feast on the urea in cat pee and break it down into ammonia. Over time, these bacteria emit additional foul-smelling gases, making the odor stronger and more resistant to basic cleaning methods.
Male vs Female Cat Urine
Male cats, especially unneutered ones, tend to produce more potent-smelling urine due to higher levels of testosterone and marking behaviors.
Use paper towels or a microfiber cloth to blot the affected area. Press firmly to soak up as much urine as possible — rubbing only spreads it.
Materials You’ll Need
Item
Purpose
Paper Towels
Absorb liquid urine
Baking Soda
Neutralize odor
Vinegar
Break down uric acid
Enzyme Cleaner
Destroy odor-causing bacteria
How to Use Natural Remedies to Eliminate Cat Urine Smell
When it comes to getting rid of cat pee smell naturally, there are some surprisingly effective household items you can use without resorting to harsh chemicals.
1. Baking Soda and Vinegar Method
Baking soda and white vinegar are often hailed as a dynamic duo in the natural cleaning world.
Step-by-step process:
Blot the area with paper towels to soak up as much urine as possible.
Mix equal parts white vinegar and water and pour it onto the stain.
Let it sit for 5–10 minutes to break down uric acid crystals.
Blot again and sprinkle baking soda over the damp area.
Leave the baking soda for several hours or overnight.
Vacuum thoroughly once the area is dry.
Why it works: Vinegar neutralizes ammonia in the urine, and baking soda absorbs lingering odors.
2. Hydrogen Peroxide and Dish Soap
This combination can penetrate fabric and carpet fibers, tackling odor at its source.
What you’ll need:
1 cup hydrogen peroxide (3%)
1 tsp dish soap
2 tbsp baking soda
Instructions:
After blotting the area, sprinkle baking soda directly onto the spot.
Mix hydrogen peroxide and dish soap and pour the solution over the baking soda.
Let it sit for 15 minutes.
Scrub gently, then blot and let the area air dry.
Note: Always test a hidden spot first to ensure the solution doesn’t bleach or discolor the fabric.
Mix equal parts vinegar and water in a spray bottle, spray generously on the stained area, then sprinkle baking soda. Let it fizz, sit for 5–10 minutes, and blot dry.
Hydrogen Peroxide + Dish Soap
Combine one cup of hydrogen peroxide, 1 teaspoon of dish soap, and 1 tablespoon of baking soda. Apply carefully (test first on a small area). Great for tougher fabrics and carpets.
Enzyme Cleaners Are the Gold Standard
These cleaners contain natural enzymes that break down uric acid — the root cause of lingering smells. Look for products labeled as “pet odor enzyme remover.”
Comparison of Natural Remedies for Cat Pee Smell
Remedy
Pros
Cons
Best For
Baking Soda + Vinegar
Cheap, safe, non-toxic
Takes time to dry
Carpets, upholstery
Hydrogen Peroxide + Soap
Strong odor elimination
May bleach colored fabrics
Tough stains on white surfaces
Enzyme Cleaners (store-bought)
Breaks down urine proteins permanently
Expensive, takes longer to work
Mattresses, deep-seated stains
Lemon Juice + Baking Soda
Pleasant scent, natural ingredients
Not as effective on older stains
Light surface smells
Top Commercial Odor Removers
Best Rated on Amazon
Product
Rating
Key Benefit
Nature’s Miracle
4.6/5
Enzyme-based deep cleaning
Rocco & Roxie
4.7/5
Safe for all surfaces
Angry Orange
4.5/5
Citrus-powered odor masking
How to Get Rid of Cat Pee Smell from Carpet
Blot up excess urine.
Apply vinegar and baking soda solution.
Let it sit for 30 minutes.
Vacuum thoroughly.
If the smell persists, follow with enzyme cleaner.
❌ Avoid using steam cleaners on urine stains. Heat can bond the uric acid crystals to the carpet fibers permanently.
Removing Cat Pee from Clothes and Bedding
Rinse items in cold water before placing them in the washer.
Add 1 cup of vinegar to the rinse cycle.
Use a laundry booster like borax or oxygen bleach.
Air-dry clothes. Avoid dryers as heat can trap the smell.
Getting Rid of Cat Pee Smell from the Couch
Blot the spot with paper towels.
Spray an enzyme-based cleaner.
Let it soak in for at least 10 minutes.
Blot again and repeat if necessary.
Use a handheld steam cleaner only after the smell is mostly gone.
Neutralizing Odor from Hardwood or Tile Floors
Wipe up urine quickly.
Clean with a pet-safe floor cleaner or diluted vinegar.
Avoid excessive moisture that could warp wood.
Finish with a light spray of enzyme solution.
How to Remove Cat Pee Smell from Furniture
Furniture is especially tricky because of how deeply fabric and cushions absorb liquids.
Step-by-Step Approach:
Blot immediately with paper towels or an absorbent cloth to remove as much urine as possible.
Use a vinegar-water solution and spray thoroughly onto the affected area.
Let it soak for 10–15 minutes to break down the ammonia and uric acid.
Blot again and apply baking soda generously.
Vacuum the baking soda after it dries completely.
Repeat if necessary for older stains.
Alternative Options:
Enzyme-based cleaners are particularly effective for sofas and chairs where urine has soaked deep into cushions.
Removable covers should be washed separately with vinegar added to the cycle.
Leave dried citrus peels near previously soiled areas. Cats dislike citrus, which can deter repeat offenses.
Activated Charcoal
Place charcoal pouches near odor spots to absorb lingering smells naturally.
Essential Oils (With Caution)
Lavender or eucalyptus oil mixed with water can freshen a room. But use only small amounts — some oils are toxic to cats.
What Not to Do
❌ Don’t use ammonia-based cleaners. They smell like urine to cats.
❌ Don’t mask the odor with air fresheners. It only hides the problem temporarily.
❌ Don’t skip enzyme treatment. Water and soap alone won’t remove uric acid.
Pro Tip: Use a Blacklight to Locate All the Spots
Cat pee glows under UV light. You can buy a cheap blacklight flashlight to scan your floors, walls, and furniture. This helps ensure no area is left untreated.
Conclusion
Knowing how to get rid of cat pee smell is essential for every cat owner. From enzyme cleaners to natural remedies and advanced tools like blacklights, your options are vast and effective. The key is fast action, the right products, and consistency. By following the methods above, you can restore your home’s freshness and prevent future accidents from turning into lingering problems.
Pro Tip
After cleaning, use an odor deterrent spray that discourages re-marking. Products like Feliway mimic natural feline pheromones and calm your cat, reducing their urge to mark the same spot again.