If you’ve ever smelled your cat’s breath and backed away in horror—welcome to the club. What most cat parents don’t know is that bad breath is often a sign of dental disease. In fact, over 70% of cats show signs of dental disease by the age of 3. Yes, that early.
Learning how to clean cats teeth not only helps eliminate bad breath but also prevents serious health issues like tooth loss, oral infections, and even organ damage. And here’s the kicker: regular brushing can save you hundreds—if not thousands—on vet dental bills.
So, if you want your cat to stay cuddly, healthy, and avoid painful dental disease, it all starts with one simple habit: regular tooth cleaning.
Understanding Cat Dental Health
Common Dental Problems in Cats
Cats can suffer from a variety of oral health issues, such as:
Gingivitis: Inflammation of the gums caused by plaque buildup.
Periodontal Disease: A more advanced stage that affects tissues and bones.
Tooth Resorption: Painful condition where teeth break down internally.
Tartar Accumulation: Leads to chronic bad breath and bacterial infections.
Importance of Early Prevention
Dental disease doesn’t stay in the mouth. Bacteria can enter the bloodstream and affect vital organs like the heart, liver, and kidneys. Catching problems early means fewer vet visits, less pain for your cat, and a longer life.
Dental hygiene is crucial for your feline friend’s overall health, yet it’s often one of the most overlooked aspects of pet care. According to the American Veterinary Dental College, by the age of three, 70% of cats show signs of periodontal disease, which can lead to pain, tooth loss, and systemic infections. Learning how to clean cats teeth early and maintaining a routine can dramatically reduce the risk of dental problems and help your kitty live a longer, happier life. It’s also worth noting that cats don’t show pain the way humans do. That means your furry companion could be suffering silently with swollen gums or a rotten tooth.
Understanding Your Cat’s Dental Structure
Cats have 30 adult teeth that are primarily built for tearing and chewing meat. Their premolars and molars help with grinding, while their sharp incisors and canines are used for catching and killing prey. Due to this predatory nature, tartar and plaque can build up quickly without natural wear and tear. This makes dental care essential, especially for indoor cats who eat soft or processed food.
Signs Your Cat Has Dental Issues
Watch for these red flags:
Behavioral Signs
Physical Signs
Drooling
Red or bleeding gums
Pawing at the mouth
Yellow/brown tartar
Refusing hard food
Loose or missing teeth
Bad breath
Swelling around the mouth
If you notice any of these symptoms, it’s time to act fast.
1. Start Early with Kitten Dental Training
Just like brushing a toddler’s teeth becomes easier if started early, so does your cat’s dental care. Get your kitten used to having their mouth touched. Gently lift their lips, rub their teeth with your finger or a soft cloth, and reward them with a treat. Doing this daily sets the stage for smoother brushing as they grow.
2. Choose the Right Cat Toothbrush and Toothpaste
Never use human toothpaste—it contains ingredients like fluoride and xylitol, which are toxic to cats. Instead, opt for a vet-approved cat toothpaste that comes in flavors like poultry or tuna. Pair it with a soft-bristled cat toothbrush or a finger brush, which makes the process less invasive. Consistency matters more than perfection; brushing a few times a week can still make a big difference.
Product
Type
Safe for Cats
Flavor
Virbac C.E.T. Enzymatic
Enzymatic Toothpaste
Yes
Poultry
Vet’s Best Dental Kit
Toothbrush + Gel
Yes
Aloe + Natural
Sentry Petrodex
Toothpaste
Yes
Malt
3. Use Dental Wipes for Easier Cleaning
If your cat refuses a toothbrush, dental wipes are a great alternative. These wipes are pre-soaked with antibacterial agents and designed to remove plaque with minimal effort. Simply wrap the wipe around your finger and rub it over your cat’s teeth. While not as effective as brushing, they still help reduce bacteria and bad breath.
4. Dental Treats and Chews Can Help
While treats aren’t a substitute for brushing, they play a supportive role. Choose treats that are specially formulated to promote dental health by scraping off plaque as your cat chews. Look for the VOHC (Veterinary Oral Health Council) seal on dental treats to ensure they meet safety and effectiveness standards.
5. Switch to Dental Cat Food for Daily Support
Some commercial cat foods are designed to improve dental health. These dry kibbles are larger and have a unique texture that helps break down plaque during chewing. Brands like Hill’s Prescription Diet t/d and Royal Canin Dental have clinically proven formulations. Incorporating these into your cat’s diet ensures a daily defense against tartar.
Brand
Type
Dental Benefit
Vet Recommended
Hill’s t/d
Dry Food
Fights plaque/tartar
Yes
Royal Canin Dental
Dry Food
Supports gum health
Yes
Purina Pro Plan Dental Health
Dry Food
Freshens breath
Yes
6. Add Water Additives for Passive Cleaning
For cats that resist all manual methods, water additives can be a lifesaver. These are odorless and tasteless liquids added to your cat’s water bowl. They contain enzymes and antibacterial agents that reduce plaque and freshen breath. While not a replacement for brushing, they’re a helpful backup option.
Some cat parents prefer holistic options. Coconut oil has mild antibacterial properties and can be rubbed gently onto your cat’s gums. Similarly, powdered kelp, added to food, is believed to reduce tartar buildup. Always check with your vet before introducing any natural remedy to ensure it’s safe for your cat.
8. Regular Vet Checkups and Dental Exams
Even the most diligent cat owner needs backup from a professional. Vets recommend annual dental exams for cats, especially as they age. During these visits, vets can detect early signs of disease and may recommend professional cleanings under anesthesia. This is the most thorough way to remove plaque and tartar from below the gum line.
9. Desensitize Nervous Cats with Positive Reinforcement
Many cats dislike mouth handling. To ease this, use positive reinforcement. Every time your cat lets you touch its mouth, offer a reward—whether it’s a treat, cuddles, or playtime. Over time, your cat will begin associating oral care with pleasant experiences.
10. Stay Consistent: Routine is Key
The best dental routine is the one you stick to. Brushing once a week is better than none at all. Choose a schedule that works for you and your cat—whether it’s brushing every other day, using wipes in between, or offering dental chews regularly. Consistency is what keeps your cat’s mouth healthy in the long run.
How Often Should You Clean Your Cat’s Teeth?
Ideally, you should brush your cat’s teeth daily, but even 3–4 times a week can significantly improve oral health. Consistency is more important than perfection.
Tools You’ll Need for Cleaning Your Cat’s Teeth
Before you dive in, make sure you have the right gear.
Tool
Purpose
Cat toothbrush
Designed for small mouths and sensitive gums
Cat toothpaste
Enzymatic and safe to swallow (never use human!)
Dental wipes
For cats who resist brushing
Dental treats
Help scrape off plaque during chewing
Finger brushes
Great for beginners or smaller cats
Step-by-Step: How to Clean Cats Teeth at Home
1. Get Your Cat Comfortable
Start slow. Let your cat sniff and lick the toothbrush and toothpaste. Praise them often and make it a positive experience.
2. Positioning Is Everything
Sit your cat in your lap or place them on a non-slippery surface. Gently lift their lip and start with your finger.
3. Use a Finger Brush or Soft Toothbrush
Gradually introduce brushing in small circular motions. Focus on the outer surfaces where plaque tends to accumulate.
4. Apply Cat-Safe Toothpaste
Flavors like chicken or seafood make brushing more tolerable for picky felines. Never use human toothpaste—it can be toxic to cats.
5. Keep Sessions Short
Start with 30 seconds per session and increase gradually.
Step
Tip
First attempt
Use a soft finger brush with a treat reward
Second week
Brush 2–3 teeth at a time
Third week
Aim for full mouth coverage
How to Introduce Tooth Brushing to Kittens
Start brushing as early as 8–12 weeks old. Kittens adapt faster than adult cats. Use soft brushes, kitten-safe toothpaste, and make it playful.
Alternatives to Brushing Your Cat’s Teeth
Can’t get near your cat’s mouth? Try these:
Dental Wipes: Wipe away food particles after meals.
Chew Toys: Some toys are made to clean while they chew.
Water Additives: Add to their water to break down plaque.
These aren’t as effective as brushing but help maintain hygiene between sessions.
Diet and Dental Health
Food plays a big role in oral hygiene.
Foods That Help Clean Teeth
Dry kibble: Helps scrape off plaque
Dental-specific diets: Vet-approved options
Raw bones (supervised): Natural cleaners
Foods to Avoid
Avoid These
Why
Sticky wet food
Clings to teeth, promotes decay
Sugary treats
Bacteria love sugar
Human table scraps
Often too salty or acidic for cats
Vet Dental Cleanings vs At-Home Care
While brushing is essential, professional cleanings under anesthesia are still necessary once a year for most cats—especially if tartar buildup is severe.
Set a time every day—after breakfast or before bed. Keep tools in the same place and make it a part of your daily bonding time.
Sample Weekly Routine:
Day
Activity
Mon
Brushing + dental treat
Tue
Wipe + water additive
Wed
Brushing only
Thu
Dental toy play
Fri
Brushing + vet diet kibble
Sat
Rest day
Sun
Full brushing session
Conclusion
Learning how to clean cats teeth doesn’t have to be a nightmare. With the right approach, tools, and patience, it becomes a bonding ritual that could add years to your cat’s life. Whether you brush daily or opt for dental-friendly diets and treats, taking action today means a healthier tomorrow for your furry companion.
💡 Pro Tip: Introduce dental care when your cat is in a good mood—after playtime or a treat. This builds a positive association and makes the process much smoother over time.
FAQs
1. What’s the best age to start brushing a cat’s teeth?
Start as young as 8–12 weeks. The earlier you begin, the easier it becomes.
2. Can I use human toothpaste on my cat?
Absolutely not. Human toothpaste contains fluoride and xylitol, both toxic to cats.
3. How long should I brush my cat’s teeth?
Start with 30 seconds and work up to 2 minutes, depending on your cat’s tolerance.
4. How often should cats get professional dental cleanings?
Once every 12–18 months is typical unless your vet recommends more frequent visits.
5. Are dental treats as good as brushing?
Dental treats help but don’t replace brushing. Think of them as helpful bonuses.
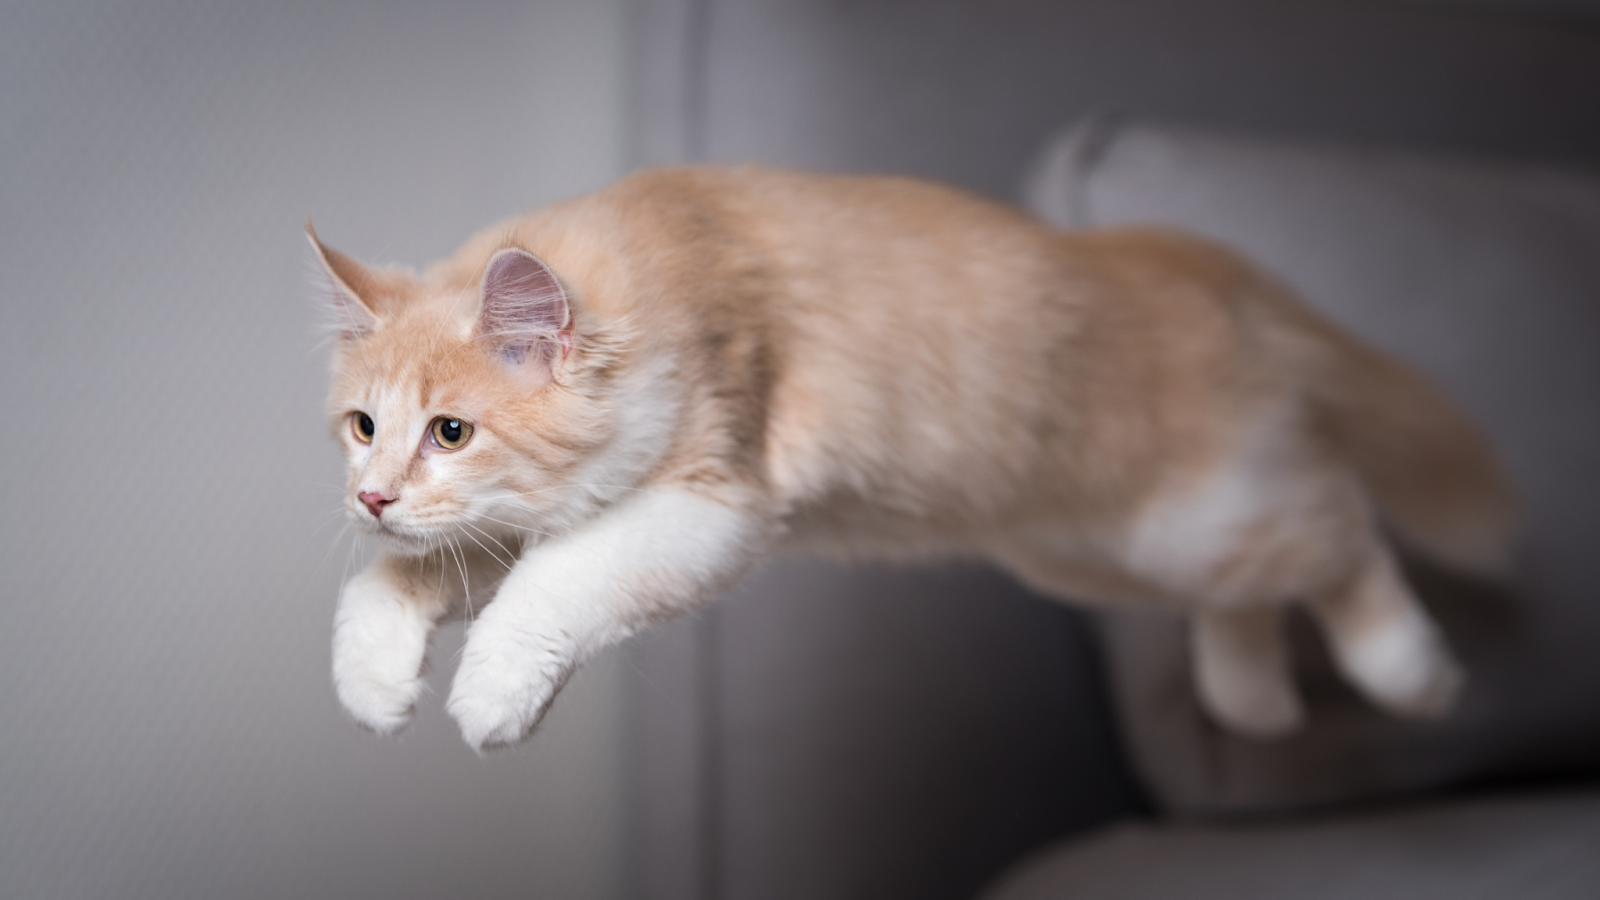
Cats are nature’s acrobats, surprising us with their remarkable athletic talents and mind-boggling leaps. It’s no wonder cat lovers stay fascinated by one burning question: How high can cats jump? Did you know most domestic cats can jump up to five or six times their body length in a single bound?
For cat owners, seeing a feline leap onto a countertop or a narrow ledge is a daily reminder of their pet’s wild side. Whether it’s making a daring jump for a sunny windowsill or evading a playful dog, cats bring awe and amusement with each graceful launch.
The Natural Athleticism of Cats
Cats have evolved to be agile predators. Their lithe bodies, powerful muscles, and sharp instincts come together for the perfect leap—whether pouncing on prey in the wild or climbing to safety indoors. Their jumping prowess is linked to survival skills, keeping them playful, healthy, and alert even as indoor companions.
Let’s jump right in: The average healthy, adult domestic cat can leap vertically between 5 to 8 feet (1.5 to 2.4 meters). This means your average tabby or Siamese can clear kitchen counters or tall furniture with ease. When compared to their body length, that’s five to seven times their height—a feat almost unheard of in the animal kingdom.
Here’s a quick comparison table:
Cat’s Height (at shoulder)
Potential Jump Height
10 – 12 inches (25–30 cm)
60–84 inches (152–213 cm)
Breed Variations and Their Impact on Jump Height
Some breeds have a clear edge. The Abyssinian, Bengal, and Savannah are known for their superior jumping prowess. Heavier or stockier breeds, like the British Shorthair or Persian, may not reach the same heights but still exhibit impressive agility.
Anatomy of a Cat’s Jump
Cats’ leaps are powered by spring-like back leg muscles. The large hind limb muscles act like coiled springs, storing potential energy and releasing it explosively during takeoff. These muscles are also responsible for running and pouncing, adding to a cat’s versatility in motion.
The Role of the Spine and Tail in Balance
A cat’s flexible spine provides a broader range of motion, enabling those graceful takeoffs and perfect landings. The tail acts as a counterweight, helping them balance and adjust mid-air—a handy trick when slipping or aiming for a narrow perch.
Coordination Between Limbs and Reflexes
Front and rear limbs work in perfect sync. In milliseconds, a cat can judge distances, push off with force, and land on even the tiniest surface without missing a beat. Their quick reflexes let them adapt on the fly, literally and figuratively.
Record-Breaking Cat Jumps
The Guinness World Record for the highest cat jump goes to Waffle the Warrior Cat in 2018—he flew an incredible 7 feet (213.36 cm) from standing still, besting even some professional athletes.
How These Cats Trained for Extreme Height
Record-setting cats don’t achieve greatness by chance. Consistent play, exercise, mentally stimulating games, and positive reinforcement are key. Owners of such cats often create obstacle courses, encourage vertical exploration, and use toys to motivate their pets.
Indoor vs Outdoor Jumping Behavior
Cats living indoors tend to jump between sofas, shelves, and countertops, while outdoor cats often leap fences, low rooftops, and tree branches. Environments with more vertical opportunities lead to improved muscle tone and coordination.
Safety Concerns and Risks Indoors
Indoor environments present risks like slippery surfaces or breakable items. Furniture placed too closely to walls—or too far apart—can result in missed landings and injury. Always ensure there’s a clear, safe path and soft landing spots for your agile friend.
Kittens vs Adult Cats: Jumping Capabilities Compared
Kittens are still developing muscle strength and coordination. Their jumps aren’t as high, but their curiosity and playfulness lay the groundwork for future acrobatics.
Senior Cats and Age-Related Decline
Older cats experience a gradual reduction in muscle mass and joint flexibility. While their desire to jump may still be strong, their abilities—and heights—diminish over time. Regular exercise can help ease the effects of aging.
Heavier cats, and those with health issues such as arthritis or obesity, may struggle with powerful jumps. Slim, healthy cats, particularly among specific agile breeds, naturally reach greater heights.
Special Cases: Disabled or Overweight Cats
Disabilities or excess weight limit mobility and jump capability. These cats benefit from gentle play, proper diet, and supportive environments that allow safe exploration without unnecessary risk.
Training and Exercises to Improve Your Cat’s Jump
Incorporate feather wands, laser pointers, and climbing trees to encourage jumping. Hide treats on different levels or shelves to motivate your cat to reach, leap, and explore.
Tools and Toys That Encourage Jumping
Cat trees, wall-mounted shelves, and tunnels allow for safe, frequent leaps. Some toys—like air-cushioned launch pads—help hone power and coordination without stress on joints.
Jumping is crucial for pouncing on prey, escaping predators, or reaching hard-to-access places. Cats use their height advantage for both offense and defense.
Climbing and Jumping in Survival
Tree climbing to escape threats or to find food, especially among feral or wild cats, is common. Masters of vertical space, felines use their leaps for survival daily.
Urban Cats and High-Rise Syndrome
High-rise syndrome is the term for injuries caused by cats falling from tall buildings—a real risk for city-dwelling, window-loving felines. Even with their agile nature, not every landing is safe.
Preventive Measures for Apartment Owners
Secure window screens and block risky balconies. Set up cat trees and perches indoors so cats have stimulating, safe climbing alternatives.
How to Measure Your Cat’s Jump Height at Home
Use a string, ruler, or sticky note on a wall to measure the highest spot your cat can reach from a standstill. Call your cat with a treat and record where their paws touch at the peak of their leap.
What Jumping Ability Tells You About Health
Strong, high jumps usually indicate robust health, flexibility, and muscle tone. Sudden declines in jumping or refusal to leap may be signs of health issues that require veterinary attention.
Common Jump-Related Injuries in Cats
Landing incorrectly may cause twisted joints, bone breaks, or pulled muscles. While cats are resilient, persistent limping, swelling, or yowling after a jump signals the need for a vet visit.
How to Recognize Jump-Related Injuries
Look for limping, reduced activity, reluctance to jump, or vocalizing pain. Even a mild sprain merits attention to avoid worsening the injury.
When to Be Concerned About Your Cat’s Jumping
If your previously nimble cat suddenly avoids jumping or can’t make it onto usual spots, don’t chalk it up to mood. Loss of mobility may point to injury, arthritis, or underlying illness.
Medical Conditions That Affect Mobility
Conditions like osteoarthritis, diabetes, or neurological disorders impact a cat’s ability to jump. Early detection and treatment make a big difference in outcomes.
Comparing Cat Jumping Ability to Other Animals
Cats take the gold! While some dog breeds can jump impressive heights (such as Border Collies leaping over 6 feet), few match the vertical feats of felines scaled to their size.
Big Cats and Their Jumping Records
Wild cousins—like mountain lions—can leap up to 18 feet vertically and 40 feet horizontally, crushing records held by our house pets. Observing big cats offers valuable insights into the origins of domestic cats’ athleticism.
Boosting Your Cat’s Vertical Game: Practical Guidance
It’s essential to foster a healthy, active environment for your feline friend, especially if you notice they love to leap around. Here are practical ways to enrich your cat’s aerial playground:
Invest in Multi-Level Cat Furniture: Cat trees, towers, and wall-mounted shelves offer vertical variety and safe jumping points.
Rotate Toys to Maintain Interest: Change toys regularly—feather wands, puzzle feeders, and interactive balls—to keep your cat mentally and physically engaged.
Set up Safe Landing Zones: Place soft mats or rugs close to favorite jump targets, especially if your home has hard flooring.
Avoid Clutter Near Jumping Spots: Ensure no fragile items are near high-traffic jump sites to reduce risk of accidents.
Sample Weekly Jumping Enrichment Plan
Day
Activity Suggestion
Benefit
Monday
Feather Wand on Cat Tower
Builds muscle and coordination
Tuesday
DIY Treat Hunt with Boxes
Encourages exploration and leaping
Wednesday
Laser Pointer Agility Session
Boosts speed and reflexes
Thursday
High-Perch Treat Placement
Increases vertical jumps
Friday
Tunnel Chase Game
Adds cardio and agility
Saturday
Shelving Route Climb
Enhances confidence, balance
Sunday
Free-Play and Recovery
Active rest, mild stretching
Signs Your Cat Loves Leaping (and When to Pause)
Visible muscle tone in their hindquarters
Frequent sprints and pouncing behavior
Preference for high vantage points like tops of cabinets or bookshelves
When to Limit Jumping:
Following surgery or injury (consult your vet)
In elderly cats with arthritis
If your house has unsafe layouts (e.g., exposed stairs or slippery countertops)
Preventing High-Rise Syndrome and Other Jump Mishaps
Apartment living brings unique challenges for adventurous cats. High-rise syndrome, though rare, can be deadly. Follow these tips:
Install Secure Screens: Make sure all windows and balconies are cat-proofed with sturdy, escape-proof screens.
Supervise Open Windows: Never leave your feline unsupervised near open, unscreened windows.
Did you know that wild cats in Africa, like the serval, can leap up to 12 feet (over 3.5 meters) vertically to snatch birds mid-flight? This puts even our house cats’ achievements into perspective and highlights their shared evolutionary ancestry.
Cat Jumping Stats Table
Cat Type
Typical Max Jump Height
Domestic Cat
5–8 feet (1.5–2.4 m)
Serval (Africa)
12 feet (3.6 m)
Cougar/Puma
18 feet (5.5 m)
Typical Dog
4–6 feet (1.2–1.8 m)
Curious to see how your cat stacks up? Use DIY methods at home, and always celebrate safe, healthy jumps!
Remember: When you ask, “how high can cats jump,” you’re tapping into one of nature’s most delightful mysteries. With love, care, and a bit of curiosity, your cat can keep leaping to new heights—both literally and in your heart.
Conclusion: The Jumping Marvel That Is Your Cat
The question “how high can cats jump” reveals more than a simple figure—it uncovers a tale of natural engineering, adaptability, and the boundless energy found in feline companions. Understanding your cat’s jumping prowess not only keeps them safe and entertained but deepens the bond between you and your extraordinary pet.
Whether your cat is a couch potato or a climbing enthusiast, their remarkable agility is something to celebrate. Stay observant, offer plenty of safe spaces to leap, and watch as your mini athlete amazes you time and time again!
FAQs
1. How high can a house cat jump vertically?
Most house cats can manage leaps up to 8 feet vertically, with some extraordinary individuals reaching even higher.
2. Do cats hurt themselves when jumping from high places?
While cats are adept at landing on their feet, falls from extreme heights can cause serious injury—a phenomenon known as high-rise syndrome. Be mindful of open windows or unprotected balconies.
3. Can you teach your cat to jump higher?
Yes! Through gentle play, obstacle courses, and treats placed out of easy reach, you can encourage a cat to boost its vertical skills.
4. What surface is safest for cats to land on?
Carpeted floors or soft mats are ideal. Hard surfaces like tile or stone increase the risk of injury if a landing goes wrong.
5. Why does my cat avoid jumping lately?
Sudden reluctance may signal pain, joint issues, or illness. Consult your vet if the change is abrupt or paired with other signs of discomfort.
So, you’re dreaming of a feline friend but perhaps your living space is a bit cozy, or you simply adore pint-sized pets? Well, you’ve landed in just the right place! Small cat breeds offer all the charm, companionship, and antics of their larger counterparts, often in a more compact package. And let’s be honest, who can resist a miniature panther or a tiny tiger? These little furballs are truly something special.
Did you know that the average weight of a domestic cat typically ranges from 8 to 12 pounds ? However, for those captivated by the idea of a feline companion that defies the norm, many small cat breeds are perfectly suited for various lifestyles, bringing immense joy and comfort. They’re not just smaller in stature, they often come with unique personalities and needs that are simply delightful to discover.
Introduction to Small Cat Breeds
The world of cats is incredibly diverse, from the majestic Maine Coon to the sleek Siamese. But for many, the allure of a small cat is undeniable. These breeds can be perfect companions for apartment dwellers, first-time pet owners, or anyone who simply appreciates a more delicate and manageable pet. It’s not just about size, though, it’s about finding the right fit for your home and heart.
Why Choose a Small Cat?
There are a plethora of reasons why someone might lean towards a smaller feline. For starters, they often require less space, making them ideal for urban living or smaller homes. Their smaller size can also translate to easier handling, grooming, and even less food consumption, which can be a boon for your budget. Plus, there’s an inherent cuteness factor that’s just hard to beat! They can be less intimidating for children or other pets, and their compact nature often means they’re quite content to curl up in your lap, providing endless snuggles.
When we talk about “small” cat breeds, we’re generally referring to felines that consistently weigh less than the average domestic cat, typically under 10 pounds, and often possess a more diminutive physical frame. It’s not just about their weight, however. Characteristics like delicate bone structure, short legs, or a more slender body type can also contribute to their “small” designation. It’s important to distinguish between a small breed and a small individual cat of a larger breed, true small breeds maintain their size across generations.
Personality Traits of Small Cat Breeds
You might think smaller size means a smaller personality, but oh, how wrong that would be! Many small cat breeds are known for their incredibly vibrant, affectionate, and playful personalities. They can be incredibly curious, social, and intelligent. For instance, some small breeds are known for their dog-like devotion, following their owners from room to room, while others are renowned for their mischievous antics. Each breed boasts its own unique blend of traits, making the discovery process all the more exciting. They certainly don’t lack in character!
Benefits of Owning a Small Cat
Owning any pet brings immense joy and responsibility, but small cats offer some distinct advantages that make them particularly appealing to many prospective owners.
Ideal for Apartment Living
This is perhaps one of the most significant benefits. Living in an apartment or a smaller home doesn’t mean you have to forgo the companionship of a cat. Small cat breeds are perfectly suited for compact spaces. They don’t need sprawling territories to feel content, a few vertical spaces, like cat trees or shelves, can provide ample room for exploration and play. Their ability to adapt comfortably to smaller environments makes them an excellent choice for city dwellers. They also tend to be less prone to destructive behaviors born out of boredom in confined spaces, provided they get enough mental stimulation.
Easier to Manage and Groom
Let’s face it, wrestling a large, strong cat into a carrier or during a grooming session can be quite the challenge. With small cat breeds, their manageable size often makes these tasks a breeze. Clipping nails, brushing their coat, or administering medication can be significantly less daunting. They also generally produce less shedding and require less space for their litter boxes and feeding stations, simplifying daily care routines. This ease of management can be especially appealing for elderly owners or those with physical limitations.
Health & Lifespan Advantages
While it’s not a universal rule, some small cat breeds, particularly those without specific genetic predispositions related to their size, can enjoy relatively long and healthy lives. Their lighter weight can also put less strain on their joints as they age, potentially leading to fewer age-related mobility issues. Of course, regular vet check-ups, a balanced diet, and plenty of love are crucial for any cat’s longevity, regardless of size.
Top Small Cat Breeds You Should Know
Now for the fun part! Let’s dive into some of the most popular and captivating small cat breeds that might just steal your heart.
1. Singapura
The Singapura holds the title of one of the smallest cat breeds in the world. Hailing from Singapore, these little cuties are renowned for their diminutive size and striking sepia-toned coats.
Size & Weight: Singapuras are truly tiny, typically weighing a mere 4 to 8 pounds. Their small stature is paired with a surprisingly muscular and compact body, making them quite agile despite their size. They often look like perpetually young kittens, which only adds to their undeniable charm.
Personality & Behavior: Don’t let their size fool you, Singapuras are brimming with personality! They are incredibly affectionate, playful, and curious. Often described as “pesky people-lovers,” they thrive on interaction and will happily follow you from room to room, inserting themselves into whatever you’re doing. They are also highly intelligent and love to explore, often seeking out high perches to observe their surroundings. These cats are quite vocal, communicating with soft chirps and trills.
Grooming & Health Tips: Their short, fine coat requires minimal grooming, usually just a weekly brush to remove loose hairs and keep it shiny. As with all breeds, regular dental care, nail trimming, and ear cleaning are essential. Singapuras are generally healthy, but responsible breeders screen for genetic conditions like Pyruvate Kinase Deficiency (PKD), which is rare but can affect them. With proper care, they can live well into their teens.
2.Munchkin
The Munchkin cat is instantly recognizable by its uniquely short legs, a characteristic that often sparks conversation and fascination.
Unique Features:The Munchkin’s defining trait is its short, dwarf-like legs, which are a result of a natural genetic mutation affecting cartilage and bone development. Despite their short stature, they are incredibly agile and playful, able to run, jump, and climb with surprising ease. They often sit up on their hind legs, resembling a meerkat, to get a better view, which is absolutely adorable. Their coats come in a vast array of colors and patterns, and they can be longhaired or shorthaired.
Controversies and Health Concerns: The breeding of Munchkin cats has been a subject of ethical debate within the feline world due to their unique genetic mutation. Some argue it can lead to health issues, particularly spinal problems. However, reputable breeders insist that Munchkins are generally healthy and do not suffer from the severe spinal issues seen in some short-legged dog breeds. It is crucial to choose a breeder who performs health screenings and prioritizes the well-being of their cats. Potential health concerns can include lordosis (curvature of the spine) or pectus excavatum (a sunken chest), though these are not widespread.
3. Cornish Rex
With their distinctive wavy coat and slender build, Cornish Rex cats are an elegant and playful addition to the small cat family.
Slim Build & Playful Temperament: Cornish Rex cats possess a unique, athletic physique. They are slender and fine-boned but surprisingly muscular, with long, lithe legs and a distinctive arched back, often described as “whippet-like.” Their average weight is typically between 6 and 10 pounds. Beyond their looks, they are incredibly playful, energetic, and curious. They retain their kitten-like enthusiasm well into adulthood, always ready for a game of fetch or a chase. They are also highly affectionate and thrive on human interaction, often perching on shoulders or laps.
Grooming Needs: The Cornish Rex’s most striking feature is its soft, wavy, short coat, which lacks the outer guard hairs found in most cats. This unique texture feels like velvet. Because of this, they are often considered a good choice for people with mild cat allergies, as they shed very little. Their coat requires minimal grooming, a gentle rub with a soft cloth or a weekly brush is usually sufficient. However, due to their thin coat, they can be sensitive to cold and enjoy warm, cozy spots.
Often confused with the Cornish Rex, the Devon Rex is another small, distinctive breed with a mischievous charm.
Differences from Cornish Rex:While both share a “Rex” name and a wavy coat, the Devon Rex’s curl is due to a different genetic mutation. Their coat is less uniform, often appearing ruffled or sparse, particularly on their undersides. Devons also have much larger, lower-set ears and a broader head with a mischievous “pixie” or “elf-like” expression. Their bodies are more muscular and less slender than a Cornish Rex. Weight-wise, they are similar, typically 6 to 9 pounds.
Energy Levels & Social Traits: Devon Rex cats are known for their incredibly playful and high-energy nature. They are fearless explorers, often found climbing to the highest points in a room or investigating every nook and cranny. They adore games, puzzles, and interactive toys. Devons are also extremely social and affectionate. They thrive on companionship and are often described as “dog-like” in their devotion, loving to be involved in all family activities. They are excellent lap cats and will happily cuddle for hours, purring contentedly. Their playful antics and loving disposition make them a joy to have around.
5. American Curl
The American Curl stands out with its truly unique ears that curl backward, giving them an alert and whimsical appearance.
Distinctive Ear Shape: The most defining feature of the American Curl is, of course, its ears. They curl gracefully backward, away from the face, in a smooth arc. This curl is present from birth, though it takes a few days to fully develop. The degree of the curl can vary, and it’s this unique characteristic that makes them so endearing. Their medium-sized bodies typically weigh between 5 and 10 pounds, making them another fantastic option among small cat breeds.
Size and Sociability: Beyond their captivating ears, American Curls are known for their balanced, moderately built bodies. They mature slowly, often not reaching their full size until 2-3 years of age. Personality-wise, they are incredibly sociable, adaptable, and affectionate. They love being part of the family and are known for their gentle nature, making them excellent companions for children and other pets. American Curls are also quite playful and intelligent, enjoying interactive games and even learning tricks. They maintain a playful, kitten-like disposition throughout their lives.
6. Siamese
While not always considered “tiny,” the Siamese cat’s lean build and elegant frame often place them in the lighter end of the cat spectrum, making them noteworthy among smaller cat breeds.
Not Always Tiny, But Lightweight: Siamese cats are often described as medium-sized, but their sleek, tubular bodies and fine bone structure give them a surprisingly lightweight feel. A healthy adult Siamese typically weighs between 5 and 10 pounds, often appearing much larger than their actual weight suggests due to their long, lithe appearance. Their distinctive point coloration (darker extremities) and piercing blue eyes are iconic.
Vocal & Affectionate Nature: The Siamese cat is perhaps best known for its vocal nature. They are highly communicative and will “talk” to their owners with a wide range of meows, chirps, and trills, often described as having a “human-like” voice. They are incredibly affectionate and crave human companionship, often forming strong bonds with one or two family members. Siamese cats are intelligent, curious, and enjoy being involved in everything their humans do. They thrive on interaction and can become lonely or bored if left alone for extended periods, making them ideal for households where someone is usually home.
7. Balinese
Essentially a long-haired version of the Siamese, the Balinese possesses the same elegant build and captivating personality, with an added touch of grace.
Graceful and Athletic: Like their Siamese cousins, Balinese cats are slender, graceful, and remarkably athletic. They typically weigh between 5 and 10 pounds, maintaining the lightweight elegance. Their most distinguishing feature is their silky, flowing tail plume and semi-longhair coat, which adds to their ethereal appearance. Despite their delicate look, they are robust and active cats who love to play and explore.
Adaptability in Small Homes: The Balinese shares the highly intelligent and social traits of the Siamese but is often considered a bit quieter, though still vocal. They are incredibly devoted to their families and thrive on companionship, enjoying playtime and cuddles in equal measure. Their adaptable nature, combined with their moderate size, makes them well-suited for various living situations, including smaller homes and apartments, as long as they receive ample mental stimulation and attention. They are fantastic at adapting to new environments and routines.
8. Oriental Shorthair
Another close relative of the Siamese, the Oriental Shorthair offers an even wider array of colors and patterns, making them truly unique.
Lean Body & Large Ears: Oriental Shorthairs share the same elegant, long, and lean body type as the Siamese, typically weighing 6 to 10 pounds. However, they come in over 300 different color and pattern combinations, setting them apart. Their striking features include large, expressive ears and almond-shaped eyes, which contribute to their distinctive, exotic look. They are truly a work of art in the feline world.
Intelligence & Vocalization: Like their Siamese and Balinese kin, Oriental Shorthairs are highly intelligent and incredibly social. They are known for their playful and curious nature, always wanting to be at the center of attention. They are also quite vocal, enjoying “conversations” with their owners and expressing their opinions freely. They crave human interaction and can become quite demanding if ignored. Their playful energy and affectionate disposition make them wonderful, engaging companions for active households.
Selecting the perfect feline companion is a big decision, and it’s important to consider a few key factors to ensure a harmonious match.
Family Environment
Think about your household dynamic. Do you have young children, other pets, or a quiet, adult-only home? Some small cat breeds are more tolerant and adaptable to the hustle and bustle of a busy family, while others might prefer a more serene environment. Breeds like the American Curl or Singapura are often noted for their good nature with children and other animals. Always introduce new pets slowly and under supervision to ensure a smooth transition.
Energy Levels & Lifestyle Compatibility
Just because a cat is small doesn’t mean it’s a couch potato! Some small breeds, like the Devon Rex or Oriental Shorthair, are brimming with energy and require plenty of playtime and mental stimulation to stay happy and healthy. If you lead an active lifestyle and want a playful companion, these might be a perfect fit. If you prefer a more relaxed feline who enjoys lounging, a different breed might be more suitable. Consider how much time you can realistically dedicate to play and interaction each day.
Allergies and Grooming Requirements
If allergies are a concern in your household, certain small cat breeds, like the Cornish Rex or Devon Rex, which have unique coat types and shed less, might be more tolerable. However, no cat is truly 100% hypoallergenic. For grooming, consider your willingness to brush regularly. While many small cat breeds have short, easy-care coats, those with longer hair, like the Balinese, will require more frequent brushing to prevent mats and tangles.
How to Care for Small Cat Breeds
Caring for small cat breeds involves many of the same principles as caring for any cat, but with some specific considerations that cater to their unique size and needs.
Proper Nutrition
Even though they’re small, proper nutrition is paramount for a small cat breed’s health and longevity. Choose high-quality cat food appropriate for their life stage (kitten, adult, senior) and activity level. Pay close attention to serving sizes, it’s easy to overfeed a small cat, which can quickly lead to obesity and related health issues. Consult your veterinarian for specific dietary recommendations. Small breeds might benefit from smaller kibble sizes for easier chewing.
Mental Stimulation & Playtime
Just like larger cats, small cat breeds need plenty of mental and physical exercise. Interactive play sessions with wand toys, laser pointers, and puzzle feeders are crucial for keeping them entertained and preventing boredom, especially if they are highly energetic. Provide plenty of scratching posts, cat trees, and perching spots to allow them to express natural feline behaviors. Rotate toys regularly to keep things fresh and engaging.
Health Monitoring & Vet Visits
Regular veterinary check-ups are non-negotiable for all cats, including small breeds. These visits allow your vet to monitor their overall health, administer necessary vaccinations, and catch any potential issues early. Be vigilant for any changes in their appetite, litter box habits, energy levels, or behavior, as these can be indicators of underlying health problems. Early detection is key to effective treatment.
Let’s debunk some common misconceptions about our smaller feline friends.
Are Small Cats Always More Fragile?
It’s a common thought that anything small must be delicate and easily breakable. While a tiny Singapura might seem more fragile than a hefty Maine Coon, most healthy small cat breeds are surprisingly robust and agile. They are built for their size and, with proper care, are just as resilient as any other cat. Of course, common sense dictates being careful with any pet, especially around young children, but their size doesn’t automatically equate to extreme fragility.
Do Small Cats Require Less Care?
This is another myth that can lead to neglect. While a small cat might eat a bit less or be easier to groom, they still require the same level of commitment, love, mental stimulation, and veterinary care as larger cats. Their emotional needs for companionship and play are just as significant. A cat’s size doesn’t dictate the amount of love and attention they need, their personality does!
Training Tips for Small Cat Breeds
Even small cat breeds can benefit immensely from training, helping to build a stronger bond and ensure a well-behaved companion.
Litter Box Training
Most cats are instinctively good at using a litter box, but consistency is key, especially with kittens. Provide a clean, easily accessible litter box with a litter type your cat prefers. For very small kittens or those with short legs (like Munchkins), a litter box with lower sides can be helpful for easy entry and exit. Accidents happen, but patience and positive reinforcement will lead to success.
Socialization from a Young Age
Exposing your small cat breed to various sights, sounds, people, and gentle interactions from a young age is crucial for developing a well-adjusted and confident adult cat. Positive experiences during their formative weeks and months can help prevent fear or aggression later in life. Introduce new situations gradually and make them positive with treats and praise.
Enrichment Activities
Enrichment is vital for a happy cat, regardless of size. This includes providing opportunities for scratching, climbing, hiding, and hunting (through play). Puzzle toys that dispense treats, interactive feeders, and regular play sessions with wand toys mimic natural hunting behaviors and provide essential mental stimulation. For active small cat breeds, consider cat wheels or outdoor enclosures (catios) if safe and appropriate.
Pros and Cons
Pros:
Manageable Size: Easier to handle, groom, and transport.
Adaptability: Many adapt well to apartment living.
Reduced Costs: Potentially less food consumption than larger breeds.
Cuddly Nature: Often enjoy being lap cats due to their compact size.
Cons:
Perceived Fragility: May require extra caution around very young children or rambunctious pets.
High Energy (for some breeds): Don’t assume all small cats are low-energy, some are very active.
Specific Health Considerations: Some breeds have genetic predispositions that need awareness (e.g., Munchkins).
What to Expect
Expect a loving, engaging companion who will become an integral part of your life. While their smaller size offers certain conveniences, they still demand your time, attention, and resources. Be prepared for playful antics, affectionate cuddles, and the unique challenges and joys that come with any pet. Research the specific breed’s personality and needs thoroughly before committing.
Small Cat Breeds vs. Kittens
It’s a common misconception that all small cats are just kittens. Understanding the difference is important when looking for a lifelong companion.
How to Tell the Difference
A kitten is a young cat, typically under one year of age, that is still growing. A small cat breed, however, is an adult cat that has reached its full growth but remains diminutive in size. You can usually tell the difference by observing their physical maturity (adult teeth, fully developed musculature, and body proportions) and behavior. Adult small cat breeds will have the refined features of their breed, whereas kittens will still have “baby” features.
Growth Stages to Watch For
If you adopt a kitten, understand that it will grow. Even a kitten of a small breed will go through growth spurts and developmental stages. Pay attention to the expected adult size of the breed. For instance, a Singapura kitten will be tiny, but you’ll notice it reaching its adult proportions and weight around 12-18 months, settling into its characteristic small frame. A regular domestic short-haired kitten, on the other hand, might start out small but quickly surpass the size of a fully grown small breed cat.
Adopting vs. Buying a Small Cat
Deciding whether to adopt from a shelter or buy from a breeder is a significant choice, each with its own set of advantages.
Benefits of Adoption
Adopting a cat from a shelter or rescue organization offers numerous benefits. You give a deserving cat a second chance at a loving home, and adoption fees are generally lower than purchasing from a breeder. Shelters often spay/neuter, vaccinate, and microchip their animals, saving you initial veterinary costs. You can also find adult cats whose personalities are already established, allowing you to choose a companion that perfectly matches your lifestyle. While specific small cat breeds might be less common in shelters, mixed-breed cats of smaller stature are often available.
Reputable Breeders Checklist
If you have your heart set on a specific small cat breed, choosing a reputable breeder is paramount.
Health Guarantees: A good breeder will offer health guarantees and be transparent about any genetic health issues in their lines.
Health Screenings: They should perform health screenings for common breed-specific conditions. For example, the Cornell Feline Health Center provides valuable resources on cat health, including genetic diseases specific to certain breeds .
Socialization: Kittens should be raised in a clean, stimulating home environment and socialized from a young age.
Transparency: They should welcome visits, allow you to meet the parent cats, and be willing to answer all your questions.
No Early Separation: Kittens should not be separated from their mother before 12-14 weeks of age.
Spay/Neuter Contracts: Many reputable breeders require spay/neuter contracts to ensure responsible pet ownership.
Choosing a companion, whether big or small, is a decision that requires thought and introspection. Small cat breeds offer a captivating blend of charm, manageability, and personality, making them incredibly appealing to a wide range of cat lovers. They fit wonderfully into diverse living situations, from bustling city apartments to quiet suburban homes. The key is to truly understand the individual needs and temperament of the breed you’re considering, ensuring that your lifestyle aligns with what they require for a happy and healthy life.
Final Thoughts and Recommendations
Ultimately, the best cat for you isn’t just about size, it’s about finding a loving companion who enriches your life and thrives in your care. Whether you’re drawn to the playful antics of a Devon Rex, the affectionate nature of a Singapura, or the unique ears of an American Curl, one thing is for sure: small cat breeds have an immense capacity to fill your home with joy and purrs. Do your research, consider adoption, or find a reputable breeder, and prepare to welcome a pint-sized package of love into your life. You won’t regret it!
Pro Tip:
For small cat breeds with high energy and intelligence (like the Devon Rex, Cornish Rex, and Oriental Shorthair), provide plenty of vertical climbing spaces, puzzle feeders, and interactive toys. This helps prevent boredom and supports their natural instincts—keeping them happy and your home free from mischief!
FAQs
1. What is the smallest domestic cat breed?
The Singapura is widely recognized as the smallest domestic cat breed, with adults typically weighing between 4 and 8 pounds.
2. Are small cats less aggressive?
A cat’s aggression level is more dependent on its individual personality, socialization, and upbringing rather than its size. While some small breeds are known for their gentle nature, any cat can exhibit aggression if not properly socialized or if they feel threatened.
3. Do small cats shed less than big cats?
Shedding is primarily determined by coat type, not size. Short-haired small breeds like the Cornish Rex and Devon Rex tend to shed less, while a long-haired Balinese will shed more, similar to a larger long-haired cat.
4. Can small cats live with large pets?
Yes, many small cats can happily coexist with larger pets, including dogs, especially if introduced properly and supervised. Socialization from a young age is key, and ensuring the larger pet is gentle and respectful of the smaller cat’s space is crucial.
5. Are small cats good with children?
Many small cat breeds, such as the American Curl, are known for their gentle and patient temperaments, making them excellent companions for families with children. However, it’s always important to teach children how to interact respectfully and gently with any cat, regardless of its size.
Big cat breeds are captivating companions, offering unique personalities and impressive stature that set them apart from their smaller feline relatives. For many cat enthusiasts, the allure of a substantial, affectionate, and sometimes playful giant is simply irresistible. This comprehensive guide will explore what makes a cat “big,” delve into their specific care needs, and introduce you to ten of the most beloved large domestic breeds, helping you decide if one of these gentle giants is the perfect addition to your family.
What Qualifies as a “Big” House Cat?
When we talk about “big cat breeds,” we’re not referring to lions or tigers, of course! Instead, we’re focusing on domestic felines that significantly exceed the typical size of an average house cat. Most domestic cats typically weigh between 8–12 pounds. However, the truly impressive “big” breeds can often tip the scales at 20–25 pounds, and sometimes even more, making them true giants of the feline world. This considerable size difference requires specific considerations for their care and well-being .
Why Choose a Large Domestic Cat Breed?
The decision to bring a large domestic cat into your home often stems from a desire for a companion with a commanding presence and an equally grand personality. Their physical appeal is undeniable, these cats often possess majestic coats, powerful builds, and an aura of gentle strength. Beyond aesthetics, many big cat breeds are known for their exceptionally amiable and dog-like temperaments. They can be incredibly affectionate, loyal, and enjoy interacting with their human families, making them wonderful pets for those who appreciate a more interactive feline friend.
Owning a substantial feline friend isn’t just about admiring their impressive size, it also comes with a unique set of responsibilities. Bigger cats, naturally, need bigger everything! This includes durable litter boxes that can accommodate their size without becoming cramped or easily tipped. Sturdier cat trees and perches are also a must, capable of supporting their weight as they climb and play. Furthermore, careful weight control is paramount. Due to their larger frames, extra pounds can put significant strain on their joints, leading to health issues down the line. It’s truly a different ballgame compared to caring for a dainty domestic shorthair .
Key Health & Lifestyle Considerations for Big Breeds
Bringing a big cat breed into your life means understanding their specific needs, especially concerning their health and daily routine. These magnificent creatures require more than just extra-large bowls, their sheer size impacts everything from their diet to their environment.
Obesity Risk: A Heavy Burden
One of the most significant health concerns for larger cat breeds is the risk of obesity. While a little extra fluff might look cute, a larger frame combined with a low activity level can quickly lead to excess weight. This, in turn, places immense strain on their joints, significantly increasing the risk of painful arthritis and other mobility issues. Imagine carrying an extra 20 pounds all day – that’s what it can feel like for an overweight big cat. Proactive measures, including portion control and encouraging regular play, are essential to keep them at a healthy weight.
Joint & Bone Health: Protecting Their Foundations
Given their substantial build, big-boned breeds like the Maine Coon and Norwegian Forest Cat are particularly susceptible to conditions like hip dysplasia. This genetic condition affects the hip joint, leading to discomfort and mobility problems as they age . Proactive care, including a joint-supporting diet and potentially supplements, can go a long way in preserving their mobility and comfort throughout their lives. Regular veterinary check-ups can help detect these issues early, allowing for timely intervention and management.
Tailored Home Setup: Making Space for Giants
A big cat needs a big habitat! Their home environment must be adapted to accommodate their size and activity levels. This means providing bigger spaces where they can stretch out and move freely. Robust scratching posts are crucial, not only to protect your furniture but also to allow them to fully extend and maintain their claws. High, sturdy perches and shelves are also highly recommended. Many large breeds love to survey their surroundings from elevated vantage points, and providing safe, stable climbing opportunities fulfills their natural instincts without risking injury .
Lifespan & Vet Care: A Lifelong Commitment
Like all pets, big cat breeds require consistent veterinary care throughout their lives. However, these breeds may have predispositions to certain health conditions that warrant specific attention. For example, hypertrophic cardiomyopathy (HCM), a heart condition, is more prevalent in some large breeds. Other genetic conditions like Progressive Retinal Atrophy (PRA) and Pyruvate Kinase Deficiency (PK-deficiency) can also affect specific lines . Being aware of these breed-specific risks allows you and your vet to establish a tailored preventative care plan, including regular screenings and monitoring, to ensure your beloved companion lives a long, healthy, and happy life.
Profiles of 10 Magnificent Big Cat Breeds 🐱
Let’s dive into the fascinating world of individual big cat breeds. Each one boasts a unique blend of size, personality, and specific care requirements.
1. Maine Coon
The Maine Coon is often called the “gentle giant” of the cat world, and for good reason! These magnificent felines typically weigh between 8–18 pounds, with males often reaching the higher end of that spectrum. They possess a semi-long, shaggy coat, a bushy tail, and tufted ears that give them a wild, yet utterly charming, appearance.
Size Range: 8–18 pounds (some males can be larger).
Personality & Activity Traits: Maine Coons are renowned for their friendly, laid-back, and sociable nature. They are often described as having “dog-like loyalty,” following their owners from room to room and enjoying interactive play. They are intelligent and can even be taught tricks, making them incredibly engaging companions. Their activity level is moderate, while they enjoy a good romp, they’re equally content to curl up for a nap nearby.
Key Health Considerations: Despite their robust appearance, Maine Coons are prone to certain genetic health issues. These include hip dysplasia, a condition affecting the hip joint, and spinal muscular atrophy, a neurological disorder. Hypertrophic cardiomyopathy (HCM), a common heart disease in cats, is also a concern in the breed .
Home-Care Tips: Given their predisposition to joint issues, it’s highly recommended to consider joint supplements as a preventative measure or for management. Regular veterinary check-ups, including potential X-rays, can help monitor their hip health. Their long, shaggy coats require regular brushing to prevent mats and tangles, especially during shedding seasons. Providing sturdy scratching posts and engaging them in interactive play will keep them happy and stimulated.
2. Norwegian Forest Cat
The Norwegian Forest Cat, or “Wegie” as they’re affectionately known, is a robust and hearty breed built for harsh climates. These stunning cats typically weigh 12–16 pounds, showcasing a muscular build and a dense, water-resistant double coat that gave them their historical role as mousers on Viking ships.
Size Range: 12–16 pounds.
Personality & Activity Traits: These cats are natural climbers and enjoy high vantage points. They are intelligent, playful, and affectionate, though often more reserved than the boisterous Maine Coon. They form strong bonds with their families but aren’t typically “lap cats,” preferring to be near you rather than on you. Their activity level is high, they thrive on exploration and play.
Key Health Considerations: Norwegian Forest Cats, like Maine Coons, can be susceptible to hip dysplasia and arthritis due to their substantial build . They can also be prone to a glycogen storage disease (GSD IV).
Home-Care Tips: To satisfy their natural instincts and keep them physically active, recommend tall, sturdy cat trees with multiple levels and perches. Interactive toys that mimic prey can also provide excellent mental and physical stimulation. Regular grooming is essential to maintain their thick, long coat, especially during seasonal shedding.
Hailing from the cold forests of Russia, the Siberian is a naturally occurring breed known for its impressive triple coat, which provides excellent insulation. These beautiful cats weigh between 12–15 pounds and mature slowly, often not reaching their full size until they are up to five years old. They are also known for being generally hypoallergenic, making them a potential choice for allergy sufferers.
Size Range: 12–15 pounds.
Personality & Activity Traits: Siberians are playful, agile, and very intelligent. They are affectionate and enjoy spending time with their human companions, often engaging in playful antics. They are known for their “dog-like” friendliness and their ability to jump to impressive heights.
Key Health Considerations: Due to their love of food and sometimes lower activity levels indoors, Siberians can be prone to obesity . They are also prone to HCM, like many other large breeds.
Home-Care Tips: Daily play sessions are crucial to keep Siberians active and prevent weight gain. Consider leash training for outdoor walks or providing a secure “catio” to give them safe outdoor exploration. Their triple coat requires regular brushing, perhaps several times a week, to prevent matting and keep it in good condition.
4. Bengal
The Bengal cat is a truly exotic-looking breed, with a wild, leopard-like coat that instantly catches the eye. These active and athletic felines typically weigh between 8–15 pounds, showcasing a sleek, muscular body. They are a hybrid breed, originally developed from crossing domestic cats with the Asian Leopard Cat.
Size Range: 8–15 pounds.
Personality & Activity Traits: Bengals are known for their high energy levels and demand for mental stimulation. They are incredibly intelligent, curious, and playful, often enjoying water and excelling at games like fetch. They thrive on interaction and can become bored and destructive if not adequately entertained.
Key Health Considerations: Due to their specific genetic lineage, Bengals can be prone to certain genetic diseases. These include Progressive Retinal Atrophy (PRA-b), which can lead to blindness, and Pyruvate Kinase Deficiency (PK-deficiency), a form of anemia .
Home-Care Tips: Providing ample mental and physical stimulation is key for a Bengal. Use puzzle feeders to engage their minds during meal times. Regular, vigorous play sessions are a must, and many Bengals enjoy agility training or learning tricks. When considering a Bengal, it’s essential to research breeders who conduct genetic testing on their breeding cats to minimize the risk of these inherited conditions.
5. Savannah
The Savannah cat is a strikingly tall and lean hybrid, resulting from a cross between a domestic cat and a Serval, an African wild cat. Their size can vary greatly depending on their “F” generation (how many generations removed from the Serval ancestor they are), with weights ranging from 12–25 pounds. F1 and F2 generations are much larger and more wild in temperament, while F4 and F5 generations are more moderate in size and behavior .
Size Range: 12–25 pounds (varies significantly by generation).
Personality & Activity Traits: Savannahs are incredibly active, intelligent, and curious cats known for their impressive jumping abilities. They can easily leap to the tops of refrigerators or tall shelves. They are highly social and form strong bonds with their families, often exhibiting dog-like traits such as leash training and enjoying water play.
Key Health Considerations: Responsible breeding is crucial for Savannahs, especially in earlier generations, to ensure good health and temperament. Their dietary needs might differ from standard domestic cats due to their Serval lineage, often requiring a high-quality, high-protein diet.
Home-Care Tips: Given their jumping prowess and high energy, Savannahs need a home equipped with secure shelves and robust climbing areas. Vertical space is essential for their well-being. They thrive on interactive play and mental challenges. Due to their high intelligence, they bore easily, so a variety of toys and enrichment activities are necessary.
6. Ragdoll
The Ragdoll is a large, strikingly beautiful cat known for its placid and gentle nature, often going limp in your arms when picked up—hence the name! These affectionate felines typically weigh between 10–20 pounds, with a semi-long, plush coat and captivating blue eyes.
Size Range: 10–20 pounds.
Personality & Activity Traits: Ragdolls are renowned for their relaxed, docile, and gentle temperament. They are extremely affectionate, enjoy being held, and often follow their owners from room to room, earning them the nickname “puppy cats.” Their activity level is relatively low, making them ideal companions for quieter households.
Key Health Considerations: Because of their generally low activity level and tendency to enjoy food, Ragdolls are susceptible to obesity and subsequent arthritis . They are also prone to HCM and bladder stones.
Home-Care Tips: Encouraging gentle exercise is important to maintain a healthy weight. Games like fetch, using a feather wand, or engaging in clicker training can provide enjoyable activity without being overly strenuous. Their semi-long coat requires regular brushing to prevent tangles and mats, though it is less prone to matting than some other long-haired breeds.
7. RagaMuffin
The RagaMuffin is a relative of the Ragdoll, specifically bred for its sweet temperament, large size, and plush coat. These big-boned and fluffy cats can weigh between 10–20 pounds and have a slow growth rate, reaching full maturity around four years of age. They come in a wide variety of colors and patterns.
Size Range: 10–20 pounds.
Personality & Activity Traits: RagaMuffins are known for their incredibly docile, friendly, and patient personalities. They are affectionate lap cats that adore human companionship and get along well with children and other pets. Their activity level is moderate, they enjoy gentle play but are also content to relax.
Key Health Considerations: Like other large, heavy breeds, RagaMuffins benefit from a focus on joint health to prevent issues as they age . They are also susceptible to HCM and polycystic kidney disease (PKD).
Home-Care Tips: Providing large cat supplies, such as spacious litter boxes and sturdy cat trees, is essential for their comfort. A high-quality diet that supports bone and joint health is also recommended. Regular grooming for their plush, dense coat will keep them looking their best and prevent matting.
8. American Bobtail
The American Bobtail is a natural, relatively uncommon breed known for its distinctive bobbed tail, which can range from one inch to half the length of a normal cat’s tail. These playful and intelligent felines typically weigh between 7–16 pounds, possessing a robust, muscular build.
Size Range: 7–16 pounds.
Personality & Activity Traits: American Bobtails are intelligent, playful, and very adaptable cats. They are known for their dog-like devotion to their families and can be very interactive. They enjoy playing games, solving puzzles, and often vocalize with chirps and trills. They are moderately active.
Key Health Considerations: Due to the genetics associated with their unique tail, some American Bobtails may have genetic spinal or hip issues. Maintaining a lean diet is crucial to avoid putting extra strain on these areas .
Home-Care Tips: American Bobtails are good candidates for leash training and enjoy interactive toys that challenge their intelligence. Puzzle toys that dispense treats can keep them entertained. Their coat length varies, so regular brushing, especially for longer-haired varieties, is recommended.
The British Shorthair is a stocky, powerful cat with a dense, plush coat and distinctive round face. These calm and easygoing felines typically weigh between 7–17 pounds, with males being noticeably larger than females. Their most famous color is “British Blue,” a solid grey-blue.
Size Range: 7–17 pounds.
Personality & Activity Traits: British Shorthairs are known for their calm, dignified, and easygoing demeanor. They are affectionate but not overly demanding, preferring to relax near their owners rather than constantly being on their lap. They are generally quiet and well-suited for apartment living. Their activity level is relatively low.
Key Health Considerations: Due to their calm nature and solid build, British Shorthairs can be prone to weight gain if their diet isn’t carefully managed . They are also genetically predisposed to HCM and polycystic kidney disease (PKD).
Home-Care Tips: Using interactive toys is vital to combat their natural inactivity and encourage regular exercise. Feather wands, laser pointers (used responsibly), or small balls can entice them to play. Monitoring their food intake and ensuring a balanced diet will help maintain a healthy weight. Their dense, short coat requires minimal grooming but benefits from weekly brushing to remove loose hair.
10. Turkish Van
The Turkish Van is an ancient and rare natural breed, known for its unique “Van pattern” (coloration primarily on the head and tail, with a white body) and its remarkable love for water. These active and muscular cats typically weigh between 10–20 pounds.
Size Range: 10–20 pounds.
Personality & Activity Traits: Turkish Vans are intelligent, energetic, and highly active. They are known for their athleticism and strong personalities. Unlike most cats, they genuinely enjoy playing in water and are strong swimmers. They are affectionate and playful but can also be quite independent.
Key Health Considerations: Generally a healthy breed, they benefit from an active lifestyle to maintain their muscular build and prevent obesity.
Home-Care Tips: Providing opportunities for water play, such as a shallow bowl or even supervised bathtub time, can be a great form of enrichment for a Turkish Van. Plenty of climbing opportunities, like tall cat trees and shelves, are also essential to satisfy their active and adventurous nature. Regular grooming for their semi-long, silky coat will prevent mats.
Deciding which of these magnificent big cat breeds is right for you is a big step, and it’s about more than just their impressive size. It’s about finding a purr-fect fit for your lifestyle.
Lifestyle Fit: Active Companions vs. Couch Cuddlers
Consider your own daily routine. Are you an active individual who enjoys playing and interacting for extended periods, or do you prefer a more laid-back companion? Some big cat breeds, like the Bengal or Savannah, thrive on constant stimulation and play, practically demanding an owner who can keep up with their boundless energy. Others, such as the Ragdoll or British Shorthair, are much more content with regular cuddle sessions and gentle playtime, making them ideal for quieter households or those with less active lifestyles. Matching your energy levels with your prospective feline friend’s will ensure harmony for years to come.
Apartment vs. House: Space & Vertical Access
The amount of space you have available is a crucial factor. While some larger breeds can adapt to apartment living, it’s often dependent on their activity level and your ability to provide ample vertical space. A Norwegian Forest Cat or Savannah, for example, will benefit immensely from a house with plenty of climbing opportunities, whether it’s through tall cat trees, wall-mounted shelves, or even secure outdoor enclosures. For apartment dwellers, choosing a less energetic breed or committing to maximizing vertical space and providing ample daily playtime becomes even more important. Remember, these aren’t your average kittens, they need room to stretch and explore.
Budget Considerations: Food, Vet Bills, Specialized Gear
Let’s face it, larger cats often come with larger expenses. They eat more, which means higher food bills, and a premium diet can be especially important for their health. Veterinary care, especially for breed-specific conditions like hip dysplasia or heart issues, can also be more costly over their lifespan. Furthermore, the specialized gear – from durable, oversized litter boxes to extra-sturdy cat trees and larger carriers – adds up. It’s wise to factor these increased costs into your budget before committing to a big cat breed.
Allergy & Grooming Needs: Shedding and Sensitivity
If allergies are a concern, some breeds like the Siberian are often touted as being “hypoallergenic” due to producing fewer of the Fel d 1 protein, though no cat is truly 100% hypoallergenic. It’s always best to spend time with the breed before committing if allergies are an issue. Grooming is another significant consideration. Long-haired breeds like the Maine Coon, Norwegian Forest Cat, and Siberian require regular, often daily, brushing to prevent mats and keep their luxurious coats healthy. Short-haired but dense-coated breeds like the British Shorthair still benefit from weekly brushing. Be prepared to dedicate time to grooming, or budget for professional grooming services.
Big-Cat Care Tips (Universal)
Regardless of the specific big cat breed you choose, some universal care tips will help ensure they lead a happy, healthy life.
Nutrition & Weight Control: A Balanced Diet for Big Bones
Proper nutrition is the cornerstone of a big cat’s health. Due to their size and potential for joint issues, a high-quality diet specifically formulated for large breeds or with joint-supporting ingredients can be beneficial. Portion control is absolutely critical, free-feeding can quickly lead to obesity, which exacerbates joint strain and increases the risk of other health problems. Regular weigh-ins at home and during vet checks will help you monitor their weight and adjust their diet as needed. Don’t be shy about consulting your veterinarian for personalized dietary advice.
Joint Support: Keeping Them Nimble
Beyond weight management, proactive joint support can make a world of difference for these larger felines. Encourage regular exercise through engaging play sessions to keep their muscles strong and joints flexible. Puzzle toys, laser pointers, and feather wands can entice even the laziest big cat to move. Your vet might also recommend joint supplements containing ingredients like glucosamine and chondroitin, especially as your cat ages or if they show signs of joint stiffness.
Environment: Making Their World Bigger
Remember the “bigger everything” rule! This means investing in large, open litter boxes that they can comfortably enter, turn around in, and exit without feeling cramped. Covered litter boxes, while sometimes preferred by owners, can feel too small for a large cat. Tall, sturdy cat trees and wall-mounted perches are essential, providing vertical space for climbing, stretching, and observing their territory from a safe height. Don’t forget an appropriately sized, durable carrier for vet visits – struggling to fit a 20-pound cat into a small carrier is no fun for anyone!
Regular Vet Visits: Early Detection is Key
Consistent veterinary care is paramount. Regular check-ups allow your vet to monitor your big cat’s overall health, track their weight, and address any concerns early. Early screening for breed-specific conditions, such as the heart issues common in Maine Coons or hip dysplasia in Norwegian Forest Cats, can lead to timely interventions and better long-term outcomes. Establishing a good relationship with a vet who has experience with large cat breeds is a huge plus.
Bringing a big domestic cat breed into your home is a decision filled with excitement and the promise of a truly unique companionship. There are definite pros and cons to consider. On the upside, these magnificent felines offer unparalleled affection, impressive beauty, and often dog-like loyalty. They can be incredibly interactive and engaging, bringing immense joy and personality to your household.
However, the cons primarily revolve around the increased commitment required. Their size necessitates larger, sturdier supplies and often higher food costs. Their potential predisposition to certain health conditions means a lifelong commitment to vigilant vet care, including regular screenings and potentially specialized treatments. Enrichment and living space are also significant considerations, these aren’t small cats that can be ignored in a corner.
Ultimately, the most important closing tip is this: choose a big cat breed based on personality, not just size. While their impressive stature is what first draws many in, it’s their unique temperament, activity level, and specific needs that will truly determine if they are the right match for your home and lifestyle. Do your research, understand the commitment, and you’ll find that these gentle giants offer a bond unlike any other.
FAQs
1. What is the biggest domestic cat breed?
While size can vary, the Maine Coon is generally considered the largest domestic cat breed, with some males weighing over 20 pounds. Savannah cats, especially early generations, can also be exceptionally large and tall.
2. Are big cat breeds harder to care for than regular cats?
Big cat breeds require specific considerations due to their size, such as larger supplies (litter boxes, carriers, cat trees), more food, and sometimes a predisposition to certain health issues like joint problems. However, with proper planning and care, they can be just as easy and rewarding to own as any other cat.
3. Do big domestic cat breeds have a longer lifespan?
The lifespan of big cat breeds is generally similar to that of smaller domestic cats, typically ranging from 12 to 15 years, although some can live longer. Their lifespan is more influenced by genetics, diet, and overall health care than by size alone.
4. Are big cat breeds good with children and other pets?
Many big cat breeds, such as the Maine Coon, Ragdoll, and RagaMuffin, are known for their gentle and tolerant temperaments, making them excellent companions for families with children and other pets. However, individual personality and proper introductions are always key.
5. Can I leash train a big cat breed?
Yes, several big cat breeds, including Bengals, Savannahs, and American Bobtails, are highly intelligent and often enjoy leash training, allowing them to safely explore the outdoors under supervision. Consistency and positive reinforcement are important for successful training.
Learning how to leash train a dog can be a game changer for any dog owner who dreams of peaceful, stress-free walks. Whether you’re dealing with a rambunctious puppy or an adult dog that pulls with all their might, mastering leash training is essential not only for control but also for the emotional and physical safety of both you and your pet.
According to the American Pet Products Association (APPA), more than 69 million U.S. households own a dog, and among them, over 80% consider daily walks a crucial bonding and exercise routine. Yet, without proper leash training, these walks can quickly turn into chaotic experiences. This guide is designed to help dog owners of all levels learn the fundamentals and advanced strategies for effective leash training. With consistency, patience, and the right techniques, any dog can be transformed into a calm and well-mannered walker.
Why Leash Training Matters
Leash training goes beyond simply teaching a dog to walk beside you. It’s about fostering communication, enhancing obedience, and promoting confidence. A dog that’s trained to walk on a leash without pulling or lunging is more relaxed, more responsive to commands, and safer in public environments. This skill makes vet visits, outdoor excursions, and even emergency situations far more manageable. Leash training also prevents injuries caused by sudden pulling, helps with socialization, and ensures your dog respects boundaries when encountering other animals or people. It’s not just a training technique—it’s a life skill that enriches both the dog’s and the owner’s lives.
The Real Impact of Leash Training: What the Numbers Say
A comprehensive study by the National Institutes of Health found that dogs who were leash trained were 33% less likely to be surrendered to shelters due to behavioral issues. That’s a powerful indicator of the impact good leash behavior has on long-term pet ownership. Many people surrender their pets not due to lack of love, but because they feel overwhelmed by behavioral problems that could have been corrected early with simple training. Leash training doesn’t just improve day-to-day life—it can literally save lives and families.
Top Benefits of Proper Leash Training
When done correctly, leash training offers a wide range of benefits that go far beyond walking.
Safety: Leash-trained dogs are less likely to run into traffic, jump on strangers, or engage in aggressive confrontations.
Mental stimulation: Walks become more interactive and engaging when a dog is focused and responsive.
Stronger bond: A calm walk promotes better communication and understanding between dog and owner.
Physical health: Controlled walks allow dogs to exercise without exhausting or overstimulating themselves.
Reduced reactivity: Dogs that walk calmly tend to be less reactive to their environment, including loud noises, other animals, and unfamiliar people.
Pulling is not defiance—it’s instinct. Dogs are naturally curious and eager to explore the environment around them. If every time they pull, they get closer to a scent, a squirrel, or an object of interest, then pulling becomes a rewarded behavior. Additionally, many dogs simply don’t understand that pulling is not acceptable. Without guidance and training, they continue to do what works. It’s your job to teach them that walking calmly brings better rewards than pulling.
Reading Their Signals
Before training can begin, it’s important to recognize signs of overstimulation, stress, or resistance. Dogs that tug constantly may be overly excited or anxious, while those that refuse to walk might feel fearful or overwhelmed. If your dog chews on the leash or lunges at others, it could be frustration or a lack of impulse control. Recognizing these behaviors helps tailor your training to address the root cause rather than just the symptom.
Common Leash Behaviors and Their Meaning
Behavior
Possible Cause
Suggested Solution
Constant pulling
Overexcitement, no prior training
Stop-and-stand technique, treats for calmness
Lunging at distractions
Reactivity, poor socialization
Create distance, use high-value distractions
Chewing leash
Teething, boredom
Redirection with chew toys
Stopping suddenly
Fear, leash pressure sensitivity
Start indoors, desensitize gradually
Essential Tools to Begin Training
Harness or Collar: Which is Better?
For most beginners, a front-clip no-pull harness is ideal. It gently redirects the dog’s momentum and discourages pulling without causing pain. Traditional collars can be effective for calm dogs, but for those that pull or are prone to tracheal pressure, harnesses offer better control and safety. Avoid choke or prong collars unless supervised by a professional trainer—they can do more harm than good when used improperly.
Choosing the Right Leash
A standard 4 to 6-foot leash is the gold standard for training. It offers just the right balance of freedom and control. Retractable leashes should be avoided during training, as they promote pulling and reduce your ability to guide and correct your dog’s behavior quickly.
Begin leash training in a distraction-free zone like your living room. Let your dog wear the harness and leash without holding it—this allows them to get used to the feel of the equipment. Pair the leash with play or feeding so that it’s associated with positive experiences.
Step 2: Reward Calm Behavior Early
The moment your dog stands calmly at your side or walks without tension, reward them. Use small, tasty treats and verbal praise. Early reinforcement of correct behavior builds habits faster and keeps the dog engaged.
Step 3: Practice “Heel” with Luring
Using a treat held close to your thigh, lure your dog into the heel position. Take one or two steps forward and reward them for following you calmly. Repeat this until your dog automatically falls into step when you begin to walk.
Step 4: Introduce Mild Outdoor Distractions
Once indoor training is consistent, move to a quiet outdoor area. Keep sessions short and gradually increase difficulty. Don’t rush into crowded streets or busy parks until your dog consistently responds to cues.
Step 5: Use the “Stop and Stand” Method
If your dog pulls, stop walking immediately. Don’t yank or scold. Just wait. The moment the leash loosens, praise and continue. This technique teaches that pulling gets them nowhere while calm walking gets them forward movement.
When Things Get Tough: Advanced Techniques
Dogs with strong pulling tendencies may need advanced tools like head halters or professional help. A head halter offers more control over the dog’s head, redirecting their gaze and attention. However, it must be introduced slowly to avoid discomfort. If you’ve tried basic methods for several weeks without improvement, consider working with a certified positive reinforcement trainer who can identify deeper behavioral patterns.
Leash Training Puppies vs. Adult Dogs
Puppies are blank slates, which can be both a blessing and a challenge. Their attention spans are short, so training must be consistent but playful. Keep sessions under 5 minutes at a time and always end with a win. Adult dogs, especially rescues, may have established habits that require patience to undo. With consistency and positive reinforcement, even older dogs can become perfect leash companions—it just takes a bit more time and understanding.
Conclusion: Training for a Lifetime of Walks
Leash training is not an overnight miracle—it’s a journey. It requires patience, empathy, and consistency. But the payoff is immense: peaceful walks, a stronger bond with your dog, and the confidence that your pet can handle the world around them. Whether you’re training a brand-new puppy or correcting years of bad habits, the techniques shared in this guide are powerful tools to reshape your walking routine. Stick with it, stay positive, and remember—your dog wants to learn from you. All they need is a chance.
Pro Tip
Use your dog’s daily meal as training time. Hand-feed them small portions during leash sessions instead of giving treats. This builds engagement, reinforces your leadership, and turns mealtime into a learning experience.
Over 69 million U.S. households own at least one dog, according to the American Pet Products Association. Yet, despite how common canine companionship is, many pet owners still face one frustrating challenge: learning how to put a harness on a dog properly. A well-fitted harness ensures your pet’s safety, minimizes pulling, and provides better control during walks. Improper use, however, can lead to discomfort, escape, or even injury.
This guide offers not only a step-by-step process but also comprehensive advice, including harness types, fit tips, training routines, safety checks, seasonal considerations, and travel use. Whether you’re a new pet parent or a seasoned dog owner looking to improve your technique, this article covers everything you need to know.
Types of Dog Harnesses and Their Uses
Different harness types suit different dog personalities, sizes, and walking behaviors. Knowing which one to choose is critical for both safety and comfort. Here’s a closer look at popular styles:
Back-Clip Harness: Ideal for calm dogs or those already leash-trained. It attaches on the back, behind the shoulders.
Front-Clip Harness: Great for dogs that pull. The leash attachment at the chest helps redirect their movement.
Dual-Clip Harness: Offers versatility with front and back leash options—perfect for training and everyday walks.
Step-In Harness: Good for dogs who dislike things over their heads. Just place it on the floor and guide their legs into the loops.
Overhead Harness: Slips over the head, buckles under the chest, and provides an all-around secure fit.
Choose based on your dog’s walking behavior, health conditions, and temperament.
Correct fit is crucial. A poor fit can cause chafing, escape attempts, or joint strain. Always use a soft measuring tape to measure your dog’s chest girth (just behind the front legs) and neck circumference.
Dog Harness Sizing Guide
Size
Weight Range
Breeds (Examples)
Chest Girth
XS
Under 10 lbs
Chihuahua, Yorkie
10″–15″
S
10–25 lbs
Dachshund, Pomeranian
14″–20″
M
25–50 lbs
Border Collie, Beagle
18″–28″
L
50–90 lbs
Labrador, Boxer, Pit Bull
24″–34″
XL
90+ lbs
Rottweiler, Mastiff, St. Bernard
32″–44″
Check for signs of tightness like fur matting or redness and adjust straps as needed.
Step-by-Step: How to Put a Harness on a Dog
Whether you’re using a step-in or overhead harness, the process must be calm, confident, and consistent.
Introduce the Harness: Let your dog sniff it while offering a treat.
Choose the Right Time: Wait until your dog is calm, perhaps after playtime or a nap.
Position Your Dog: Have them stand or sit in a stable area.
Fit the Harness:
Overhead style: Slip it over the head, bring straps under the chest, and buckle.
Step-in style: Lay it flat, lift paws into position, then secure on the back.
Adjust for Fit: Use the two-finger rule between strap and skin.
Check for Comfort: Walk your fingers around the harness to ensure no tight spots or twisted straps.
Clip the Leash: Attach to the right D-ring based on your training goals.
Harnesses wear out over time. Even premium brands aren’t meant to last forever.
Signs You Should Replace Your Dog’s Harness
Sign
Why It’s Important
Frayed straps
Can weaken and snap unexpectedly
Loose or broken buckles
Reduces safety during walks
Foul smell or mildew
Indicates buildup of bacteria
Dog has outgrown the harness
A tight fit may affect mobility
Rubbing or hair loss marks
Means harness is not fitting right
Check the condition of the harness weekly, especially after wet weather.
Special Considerations for Puppies and Seniors
Young puppies and older dogs both require special attention when using a harness.
Puppies: Their bones are still forming. Choose lightweight, padded harnesses. Check the fit weekly.
Senior Dogs: Arthritis and joint issues may make overhead styles uncomfortable. Step-in or padded harnesses are ideal.
Dogs with physical challenges (e.g., blind or deaf) may benefit from harnesses with guiding handles or extra support straps.
Harness Use in Hot and Cold Weather
Weather changes how your dog experiences the harness.
Hot Weather: Use breathable mesh harnesses to prevent overheating. Avoid dark colors under direct sun.
Cold Weather: Adjust the harness over or under jackets. Check for strap tightness over layers.
Never leave a wet harness on your dog after rain or swimming. Moisture can cause rashes or skin infections.
Harness Safety During Car Travel
Harnesses are not just for walks—they’re also essential for safe car rides.
Use a harness with a seatbelt attachment or a crash-tested travel harness.
Never attach a leash and let the dog roam in the car—this is unsafe and can distract the driver.
Travel harnesses typically have broader chest plates for impact protection.
Always use a dog seatbelt clip attached to the back D-ring for car rides.
Final Thoughts: Make Harness Time Positive and Safe
Learning how to put a harness on a dog isn’t just a skill—it’s part of building trust and ensuring safety for both you and your pet. From choosing the right type, checking the fit, avoiding common errors, to preparing your dog with calm, consistent training, every step matters. Whether you’re planning regular strolls or adventurous hikes, the right harness ensures control, comfort, and connection.
Investing in a quality harness and taking time to introduce it thoughtfully can turn walks from stressful to joyful. Dogs are more than pets—they’re family. Make every walk count.
Ever found yourself wondering, why do dogs lick their feet so much? You’re not alone—this quirky yet common behavior puzzles many pet parents. While occasional licking is totally normal, persistent paw-licking can signal something deeper like allergies, anxiety, or even hidden pain.
This guide is your all-in-one resource to decode what your dog’s paws are trying to tell you. We’ll walk you through 15 eye-opening reasons behind this behavior, from the innocent to the urgent, and share what you can do to help. Whether it’s licking due to dry paws or an underlying infection, we’ve got you covered.
1. Grooming Habits in Dogs
Why self-cleaning is normal
Dogs are naturally clean animals. Much like how cats groom themselves, dogs also use their tongues to remove dirt, debris, or even food particles from their paws. This becomes more apparent after a walk or romp in the garden.
When it becomes obsessive licking
But here’s the catch—if you notice your dog licking the same spot frequently, especially to the point of hair loss or skin irritation, it’s no longer just grooming. It’s a red flag that something else is going on beneath the surface.
Allergies are a top reason dogs constantly lick their paws. Environmental allergens like pollen, mold, and dust mites can settle on their fur and paws, causing itching and discomfort. Similarly, food ingredients like chicken, beef, or grains may also trigger allergic reactions.
Common allergens that affect paws
Common Allergen
Reaction in Dogs
Pollen
Itchy paws and sneezing
Chicken
Redness, hot spots
Grass
Paw licking, rashes
Dust mites
Constant scratching
3. Dry or Cracked Paw Pads
Seasonal changes and their effect
Changes in weather—especially during winter or summer—can dry out a dog’s paw pads, causing them to crack and become uncomfortable. This leads dogs to lick their paws excessively as an attempt to moisturize and soothe them.
Symptoms of paw pad irritation
Look out for flaking skin, bleeding, or rough patches. These are signs your dog’s paws are dry and need care.
4. Anxiety and Stress Responses
Dogs licking as a calming mechanism
Licking releases endorphins, the feel-good hormones that help dogs self-soothe. It’s their version of biting nails or pacing. A sudden move to a new home, loud noises, or separation anxiety can all trigger this behavior.
Signs your dog is stressed
Panting when not hot
Pacing or whining
Yawning or lip-licking
Excessive paw licking
5. Pain or Discomfort
Hidden wounds or foreign objects
Sometimes a thorn, splinter, or even a tiny stone can get lodged in your dog’s paw pad or between the toes. Because dogs can’t tell us where it hurts, they often resort to licking to manage the pain.
How dogs express pain through licking
If your dog licks one paw consistently, check it for swelling, cuts, or embedded objects. Persistent licking of a specific paw is often a pain response.
Parasites like fleas or mange mites cause extreme itching and discomfort. Licking may be their desperate attempt to find relief.
Yeast or bacterial infections
Moisture between a dog’s toes is a perfect breeding ground for yeast. Bacterial infections can also set in quickly, especially if your dog licks open wounds, worsening the problem.
7. Boredom and Behavioral Issues
Lack of stimulation
Dogs are intelligent animals. When they’re not mentally or physically stimulated enough, they develop repetitive behaviors like licking.
Compulsive behaviors in dogs
Boredom-induced licking can spiral into a habit. If your dog is home alone often or doesn’t get enough playtime, paw licking might become their go-to distraction.
A lack of certain vitamins and fatty acids can cause dry, itchy skin and inflamed paw pads. In particular, omega-3 and omega-6 fatty acids are crucial for skin health.
Importance of omega-3s
Dogs deficient in omega-3s are more likely to suffer from itchy skin and inflammation. Add fish oil or a vet-recommended supplement to their meals.
9. Hormonal Imbalances
Hypothyroidism and Cushing’s Disease
These common endocrine disorders in dogs often lead to hair loss, irritated skin, and compulsive licking, especially on the paws.
Hormone-related skin issues
If your dog has other symptoms like weight gain, fatigue, or changes in appetite, it’s worth testing for hormonal imbalances.
10. Chemical Irritants
Lawn treatments, floor cleaners
Harsh chemicals found in garden treatments and household cleaning products can stick to your dog’s paws, causing irritation or burns.
Residue that lingers on paws
Always wipe your dog’s feet after a walk or after cleaning floors. Even “pet-safe” cleaners can cause issues for sensitive dogs.
11. Seasonal Changes and Allergens
Spring and fall allergy spikes
Many dogs experience seasonal allergies just like humans. These flare-ups often cause paw licking due to itchy skin and airborne irritants.
How to prep for seasonal paw care
Wiping paws, using booties, and allergy relief supplements can help your dog survive seasonal transitions.
12. Arthritis and Joint Pain
Age-related licking habits
Older dogs often lick their paws as a response to joint discomfort or early arthritis. It’s their subtle way of saying, “Hey, something hurts.”
Supporting aging dogs
Joint supplements, orthopedic beds, and gentle exercise can reduce the urge to lick painful joints.
13. Habit Formed Over Time
Dogs repeating learned behavior
Sometimes, your dog starts licking for a good reason—like an injury—but continues out of habit even after the problem’s gone.
Positive reinforcement gone wrong
If you unknowingly rewarded the behavior (e.g., by giving a treat to distract them), they may continue licking just to get your attention.
Some breeds, like Labradors, Golden Retrievers, Bulldogs, and Poodles, are more prone to paw licking due to allergies or skin sensitivity.
Why some breeds are more sensitive
It often comes down to genetics. Knowing your breed’s predispositions helps you stay a step ahead of paw problems.
15. Underlying Medical Conditions
Autoimmune diseases
Autoimmune diseases like lupus can cause painful skin lesions, especially on the paws, which prompt constant licking.
Cancer and rare illnesses
In rare cases, paw licking may be linked to tumors or nerve pain. If all other causes are ruled out, consult a veterinary specialist.
Solutions to Help Your Dog
Symptom
Possible Cause
Suggested Solution
Red paws & itching
Allergies
Antihistamines, hypoallergenic food
Constant licking at night
Anxiety
Calming chews, anxiety toys
Limping with licking
Pain or injury
Vet check, paw inspection
Smelly paws
Yeast infection
Antifungal paw soak
Prevention Tips
Wipe your dog’s paws after walks
Avoid harsh chemicals on floors
Keep their nails trimmed
Feed a balanced, nutrient-rich diet
Provide plenty of exercise and mental stimulation
When to Call the Vet
If your dog’s licking leads to bleeding, infection, or obvious discomfort, don’t wait. Call your vet if you notice:
Open wounds or sores
Limping or swelling
Sudden changes in licking behavior
Hair loss or skin discoloration
Conclusion
So, why do dogs lick their feet? The answer ranges from simple grooming to serious health concerns. By understanding your dog’s behavior, checking for triggers, and acting early, you can keep those paws happy, healthy, and free from excessive licking.
Pro Tip:
Start a paw-care journal. Note down when your dog licks, after what activities, and any changes in diet or environment. Patterns often reveal the root cause faster than trial and error.
1. Is it normal for dogs to lick their paws every day?
Occasional licking is totally normal, especially after walks. But frequent, obsessive licking isn’t—it could signal allergies, pain, or behavioral issues.
2. Can allergies cause dogs to lick their feet?
Yes. Environmental and food allergies are major culprits behind paw licking in dogs.
3. How do I stop my dog from licking its paws raw?
Find the cause first—then use vet-approved treatments, paw balms, and distractions like chew toys.
4. Are certain breeds more likely to lick their feet?
Yes. Bulldogs, Labs, and Poodles are more prone due to skin sensitivities and allergies.
5. What natural remedies can I try?
Apple cider vinegar soaks, coconut oil, and chamomile rinses can soothe irritated paws—but always check with your vet first.
So, how many times a day should a dog eat? If you’ve ever caught your pup giving you that “I’m starving” look—right after dinner—you’re definitely not alone. Choosing the right feeding schedule can be tricky, but it’s crucial for their overall health, happiness, and even lifespan.
Here’s a fact to start with: According to a study published in the Journal of Animal Science, dogs that eat twice a day have more stable blood sugar levels and live healthier lives compared to those fed only once a day. Feeding routines matter more than most people think.
In this guide, you’ll learn everything from puppy chow tips to senior feeding strategies—all while weaving in the golden rule of pet parenting: balance. Whether your furry friend is a hyper Jack Russell or a mellow Mastiff, you’ll find the right schedule by the end of this read.
Understanding Your Dog’s Nutritional Needs
Every dog is unique. That means their nutritional needs vary based on age, breed, size, activity level, and overall health. A small Chihuahua with a turbocharged metabolism may need smaller, frequent meals, while a Great Dane might do best with fewer, spaced-out meals to prevent bloat.
Puppies grow fast and burn energy even faster. That means they need to eat 3–4 times a day. Their smaller stomachs can’t hold large meals, and going too long without food can cause low blood sugar.
Adults (1–7 Years)
Most healthy adult dogs should eat twice a day, typically morning and evening. This keeps their metabolism steady and prevents begging or scavenging behaviors.
Seniors (7+ Years)
Older dogs may have slower metabolisms and less activity, so you might reduce portion size but maintain the 2 meals per day rule. If your dog has arthritis or dental problems, switching to softer foods and adjusting timing can help.
Morning or Evening: What’s the Best Time to Feed Your Dog?
The general recommendation is to feed your dog in the morning (7–9 AM) and again in the evening (5–7 PM). This aligns with their natural digestion rhythm and keeps their energy levels balanced throughout the day.
Benefits of morning feeding:
Boosts energy levels for active play
Helps maintain metabolism
Evening meals:
Keeps dogs satisfied overnight
Reduces early morning hunger barking
Dry vs. Wet Dog Food – Does It Affect Meal Timing?
Yes, it does! Dry food is more calorie-dense and keeps dogs full longer, while wet food digests faster and may leave your pup hungry sooner.
Food Type
Calories per Cup
Satiety Level
Feeding Impact
Dry Food
~350–500
High
Longer gaps possible
Wet Food
~100–200
Medium–Low
May need more frequent meals
Mix
~250–350
Moderate
Balanced approach
Dog Breed and Size: Why It Matters in Feeding Schedules
Toy and Small Breeds (e.g., Pomeranians, Yorkies)
These pups are more prone to hypoglycemia if they go too long without food. Feeding them 3–4 times a day helps maintain steady glucose levels.
Large and Giant Breeds (e.g., Great Danes, Mastiffs)
Bigger breeds are at risk of bloat (gastric torsion). To avoid this, they should eat 2 meals spaced 10–12 hours apart, and never right before or after exercise.
Feeding Guidelines According to Dog Weight
Dog Weight
Meals per Day
Total Daily Amount (Dry Food)
Under 10 lbs
3–4
½ – ¾ cup
10–25 lbs
2–3
¾ – 1½ cups
25–50 lbs
2
1½ – 2½ cups
50–90 lbs
2
2½ – 4 cups
Over 90 lbs
2
4 – 6 cups
Always adjust based on your dog’s activity level and vet’s recommendation.
Behavioral Signals Your Dog is Hungry or Overfed
Hungry signs:
Whining or barking near meal time
Pacing or following you to the kitchen
Licking bowls or floors
Overfeeding signs:
Lethargy
Rapid weight gain
Loose stools or frequent gas
Watch and listen—your dog is always communicating!
Water helps digest food and absorb nutrients. Your dog should always have access to fresh, clean water.
Dog Weight
Daily Water Need
Under 10 lbs
1 cup
10–25 lbs
2–3 cups
25–50 lbs
3–5 cups
50+ lbs
6+ cups
Ensure bowls are cleaned regularly to prevent bacteria build-up.
Activity Level and Meal Frequency
Dogs who run, hike, or work (like service dogs) will burn more calories and may need more frequent or larger meals. Couch potato pups? Stick to the basics.
Special Conditions and Dietary Needs
Dogs with Diabetes or Pancreatitis
These dogs need very strict feeding times and special prescription diets. Always consult a vet before adjusting their meals.
Pregnant or Lactating Dogs
They often require 3+ meals per day and higher calorie intake to support puppies. Special diets high in protein and calcium are recommended.
Common Feeding Mistakes to Avoid
Overfeeding with treats
Changing foods too often
Feeding human leftovers
Not measuring portions
Ignoring age-based food changes
Conclusion
Knowing how many times a day should a dog eat can feel overwhelming, but once you factor in their age, breed, size, and lifestyle, the answer becomes clearer. Feeding your dog isn’t just about filling a bowl—it’s about building a daily habit that supports their health and happiness for years to come.
A balanced diet, routine schedule, and a little observation can go a long way in improving your dog’s life. When in doubt, trust your vet—and trust your gut!
Pro Tip: Make Mealtime Enriching!
Turn boring meals into brain games! Use slow-feeders, puzzle bowls, or hide kibble around the house to engage your dog’s natural foraging instincts. It boosts mental health while keeping them full—win-win!
Whether you’re looking for essentials or the coolest dog accessories, this guide will help you find trending pet products that ensure your furry friend gets the best.
Why Investing in the Best Dog Products Matters
Enhancing Comfort and Well-being
High-quality supplies, such as ergonomic beds and eco-friendly toys, can make a big difference in your dog’s comfort.
Durability and Cost-Effectiveness
Investing in premium products means fewer replacements. A durable leash, for instance, can last for years, saving money in the long run.
Biodegradable waste bags and recycled-material toys are gaining popularity among environmentally conscious pet owners.
Subscription Boxes
Receive a curated selection of toys, treats, and grooming products every month. It’s like Christmas for your pet!
Customizable Accessories
Add a personal touch with engraved tags, monogrammed beds, or embroidered collars.
How to Spot High-Quality Dog Accessories
Materials and Craftsmanship: Ensure the product is made from non-toxic and durable materials.
Reviews and Ratings: Check what other pet owners have to say.
Safety Standards: Look for certifications that guarantee pet safety.
Tips for Buying Trending Pet Products
Assess Your Dog’s Needs: Consider size, age, and activity level.
Stick to Your Budget: Many premium brands offer affordable options during sales.
Shop Smart: Online platforms like Chewy and Amazon have extensive collections with user reviews to guide your purchase.
Conclusion
Investing in the best dog supplies is more than just a luxury—it’s a way to show love and care for your furry friend. From basics like food bowls to trending accessories like GPS trackers, there’s something for every pet and budget.
Pro Tip
Always measure your dog accurately before purchasing clothing, collars, or harnesses. A well-fitted accessory not only ensures comfort but also enhances safety during outdoor activities.
Ever seen your pup twitching, whimpering, or paddling in their sleep and wondered—do dogs have nightmares? If so, you’re not alone. It’s a question many pet parents ask after witnessing their furry companions seem restless or even distressed during slumber. The concern is valid—what if it’s more than just a dream?
The difference between regular dreams, nightmares, night terrors, and REM sleep behavior disorder
What you can do (and should avoid doing) to help your dog sleep better
When it’s time to see a vet
Understanding Dog Sleep & Dreams
Dogs experience a sleep structure similar to humans, moving between different phases including light sleep, deep sleep, and REM (Rapid Eye Movement) sleep. REM sleep is especially significant because it is during this phase that dreaming occurs. During REM, dogs often exhibit physical signs such as paw twitching, soft vocalizations, and facial movements—indicating they’re actively dreaming. Puppies and older dogs tend to spend more time in REM sleep, possibly due to higher levels of mental processing and memory consolidation. The presence of these dream phases in canine sleep cycles supports the theory that dogs not only dream but may also experience nightmares.
The duration and quality of canine sleep cycles vary based on breed, age, and daily activity levels. Small breeds usually enter REM sleep faster and more frequently than larger breeds. While adult dogs typically sleep for about 12–14 hours a day, puppies and seniors might sleep even longer. Adequate REM sleep is essential for a dog’s emotional balance and cognitive development. Interruptions in these cycles can lead to behavioral changes and increased anxiety. Understanding the nuances of canine sleep cycles is the first step in interpreting the behaviors we observe during our dog’s rest.
Try CBD treats or calming supplements (consult vet)
Offer mental stimulation throughout the day to avoid nighttime restlessness
Better Sleep Checklist for Dogs
Factor
Recommendation
Exercise Routine
30–60 minutes daily walk/play
Sleep Spot
Quiet, familiar, and cozy environment
Anxiety Management
Calming chews, white noise, vet help
Feeding Schedule
Avoid large meals before bedtime
Pre-Sleep Rituals
Short walk, calm time, belly rub
When It’s Time to Seek Professional Help
If your dog’s sleep disturbances are frequent, intense, or accompanied by disorientation or aggression, it’s time to consult a professional. Document the episodes, noting when they occur, how long they last, and what behaviors are observed. A veterinarian may recommend diagnostic tests, behavioral therapy, or medication depending on the severity of the condition. In some cases, sleep disorders may be linked to underlying neurological or psychological issues that require specialized treatment.
Don’t dismiss frequent nightmares, night terrors, or possible REM sleep behavior disorder as minor quirks. These episodes can seriously affect your dog’s well-being and quality of life. Early diagnosis and consistent care can make a world of difference.
When to Call the Vet
Reach out if your dog:
Has frequent or violent sleep disruptions
Shows behavioral changes during the day
Injures themselves during sleep
Seems confused or aggressive after waking
Pro Tip: Record the sleep episode and show it to your vet. This helps in diagnosing conditions like RBD, seizures, or trauma response.
What to Record Before Visiting a Vet
Observation Area
Details to Note Down
Episode Frequency
Daily, weekly, rare
Behavior During Sleep
Growling, biting, vocalizations
Post-Sleep Reaction
Confusion, aggression, fear
Video Evidence
Short clip of behavior if possible
Triggering Patterns
Loud noise, stressful event, diet change
Conclusion
So, do dogs have nightmares? You bet they do. Our canine companions experience a rich dream life, just like us. Most dreams are harmless—even amusing—but nightmares and disorders like night terrors or REM sleep behavior disorder require extra care and observation.
Understanding your dog’s sleep behavior, offering comfort when needed, and knowing when to consult a vet can go a long way in ensuring peaceful slumber for your furry friend.
Pro Tip: A well-exercised, mentally stimulated, and emotionally secure dog is less likely to have frequent nightmares. Make bedtime a safe and loving part of their routine.
It depends. If it’s a mild dream, gently calling their name might help. But never shake or touch a dog aggressively during intense episodes—they might lash out unintentionally.
2. Can dogs dream about their owners?
Yes! Dogs often dream about familiar experiences—playing fetch, cuddling, or walking with their humans.
3. Why does my dog twitch or bark in sleep?
That’s a sign of active dreaming during REM sleep. It’s typically normal and not a cause for concern unless it becomes violent.
4. How do I know if it’s a seizure or a nightmare?
Nightmares happen during REM and your dog usually wakes up quickly. Seizures often come with stiff limbs, drooling, or unconsciousness.
5. Can anxiety cause nightmares in dogs?
Yes, dogs with anxiety or past trauma may have more frequent or intense nightmares. Providing a secure environment and managing their stress can help.